

How to Change Camera Order of Connected Cameras
This allows you to change camera order on the view.
Step by Step Instructions
1. Look at the order the cameras were added and keep track of the IP’s of the cameras you want to re-arrange.
2. Delete the cameras and add them in that specified order.
1. Keep track of what channels you want to switch. The recorder’s channels are assigned by the numbered BNC ports on the back of the unit. Labeling the channels might help when switching the ports around to the specific order you want.
2. Unplug the BNC connectors and move the correct camera to the correct channel.
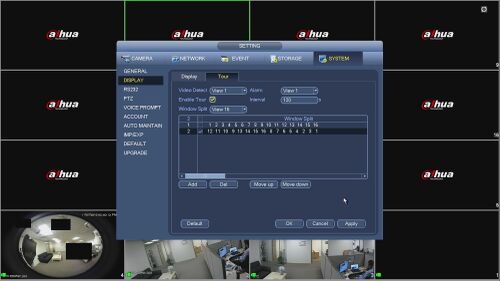
1. The cameras are prioritized by the BNC ports for the first set of channels. If you want the IP channels to appear first you will need to setup a tour mode on only one tour setting. Open the menu on the NVR and select SYSTEM(under SETTING)->DISPLAY->TOUR
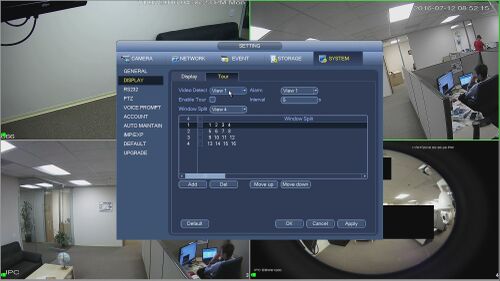
2. Check the Enable Tour box.

3. Make sure all of the Window Split Views (1,4,8,9,16) are left unchecked, otherwise this will initiate a tour of the checked views.
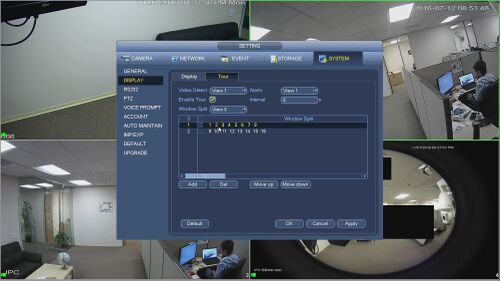


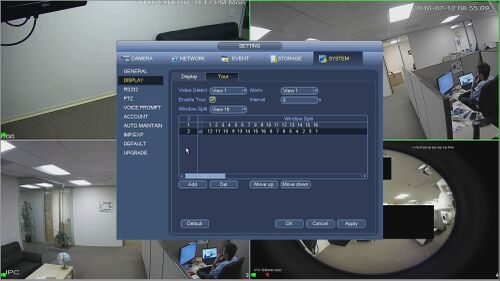
4. Now setup one tour under the grid view you want to look at, this demo is 16 views.

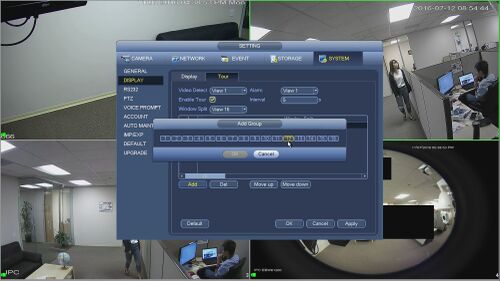
5. Select Add, and highlight the channels in the order you want to see them on the screen and click OK when finished.
6. Make sure the custom tour that was setup is checked and then enter 120s (or the maximum) on the Interval area.
7. Select apply
How to Change Camera Order of Connected Cameras Using Sequence
This allows you to change camera order on the view. This features differs from the previous rendition because the changes stay after a reboot.
PTZ Troubleshoot
Please Note: IP and HD-CVI PTZs do not require an RS485 cable. Controls are sent over the RG59 or CAT5 cable.
Keyboard can not control NVR.
Related Links
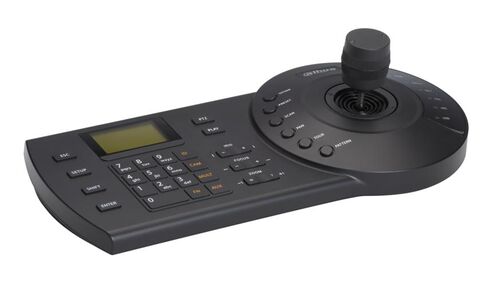
Network Keyboard – NKB1000, DH-KBD1000, DH-KB1000
How to Setup NKB1000 over Network
How to Setup NKB1000 via RS232
How to Setup NKB1000 via RS485
How to Setup NKB1000 via USB and SmartPSS
Keyboard can not control NVR
NKB1000
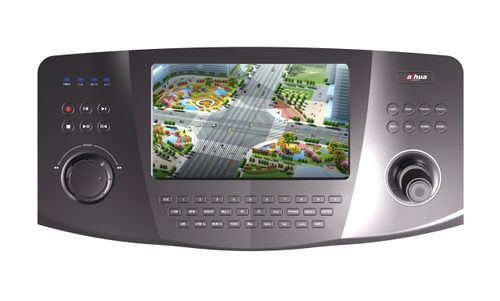
NKB3000
Motion Detect PTZ Activation
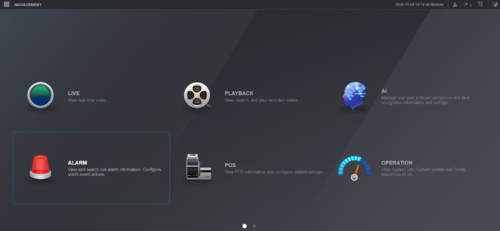
This article is to show how to call/ link/ activate PTZ camera when motion triggered on the other camera channel in the recorder.
Step by Step Instruction
1. Login to Dahua recorder from local system interface.
2. Go to Alarm.
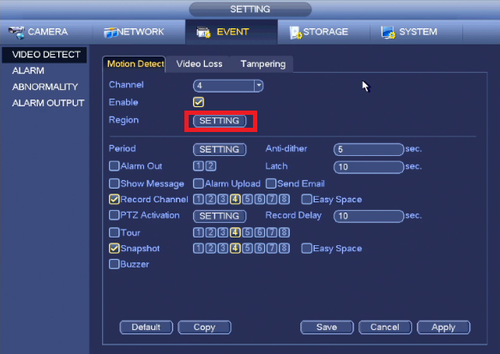
3. Go to Video Detection > Motion Detect.
4. Select the camera channel that you wish to call PTZ camera when motion triggered.
5. Click on “Settings” button under PTZ Activation.
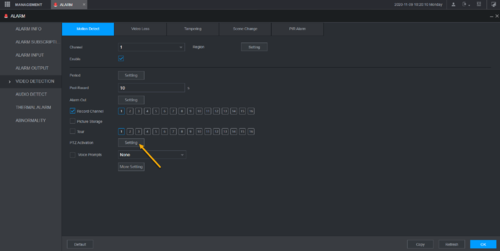
6. Select the PTZ camera channel and specify the preset number. Then Click OK.

7. Click OK again to save the settings.
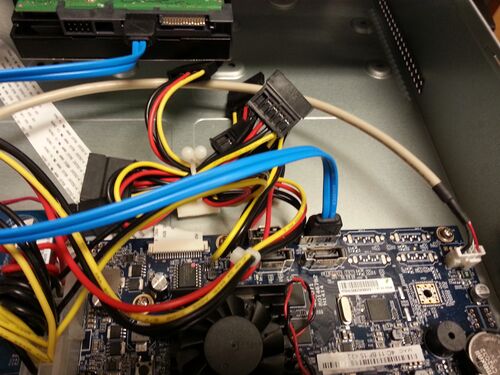
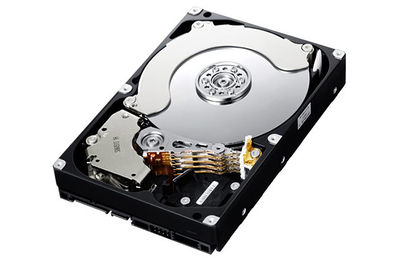
System can not detect hard disk.
There are following possibilities:
Solutions
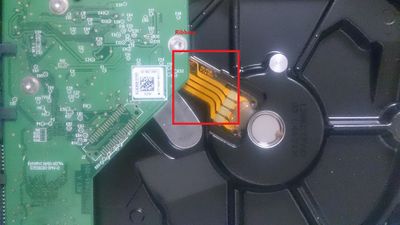
SATA Cable
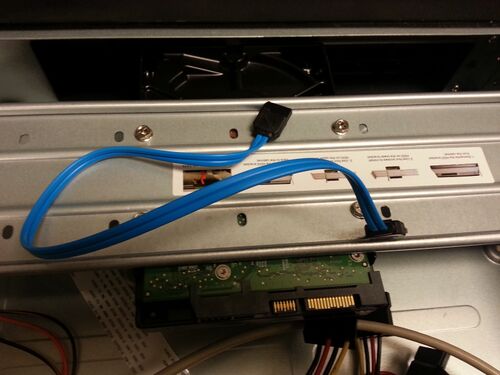
SATA into Harddrive
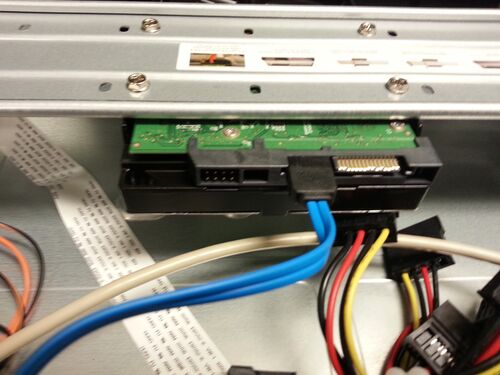
SATA from motherboard to Harddrive
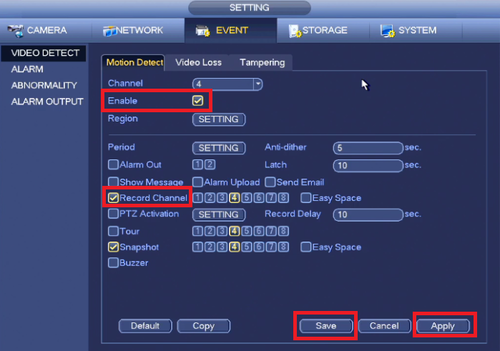
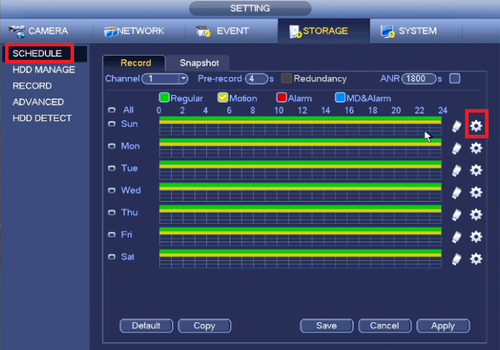
Motion detection function does not work
There are following possibilities:
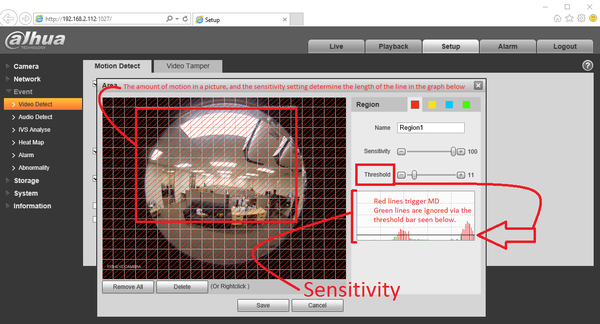
1. Sensitivity is too low, or Threshold too high.
2. Most third-party cameras will not have the full capabilities, like motion detection, to work.
3. Check if firmware of Recorder and IP camera is current.
4. Ensure motion detect is enabled on each camera, applied and saved.
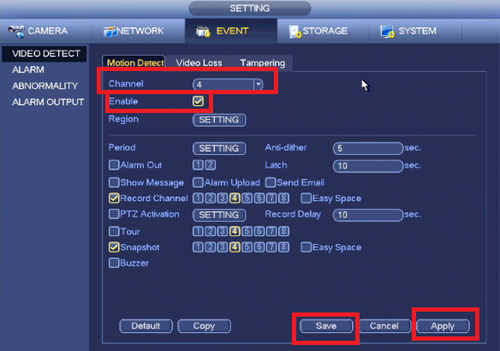
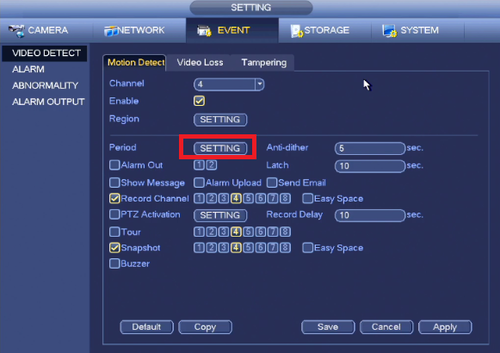
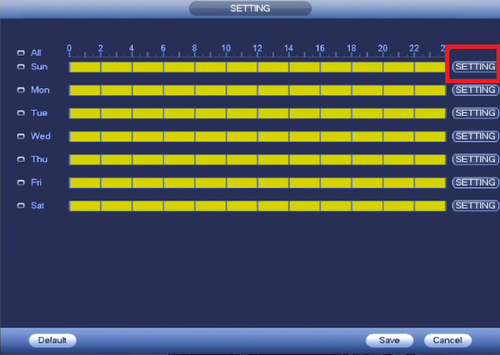
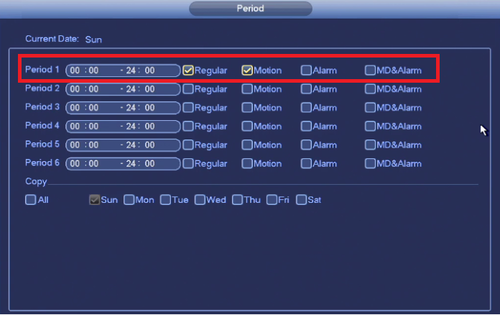
5.Period setup is not correct.
6. Motion detection region setup is not correct.
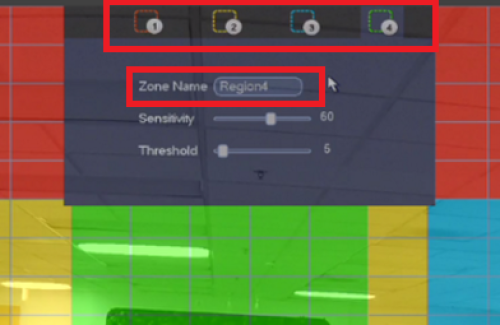
Here on the region settings you have a total of 4 regions you can set for each camera view. In each region you can set the sensitivity and threshold at different levels.
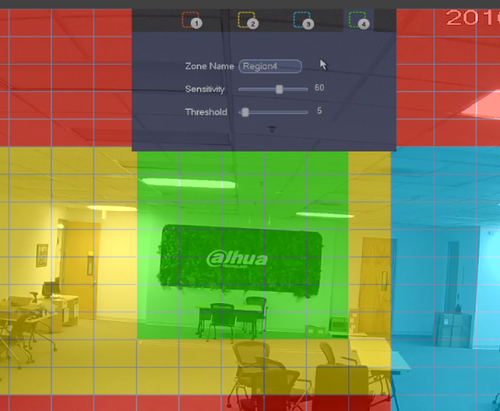
The regions are numbered reigion 1 – 4. Each numbered region has a corresponding color as follows:
Region 1 is red
Region 2 is yellow
Region 3 is blue
Region 4 is green
Here is an info-graphic explaining sensitivity and threshold:
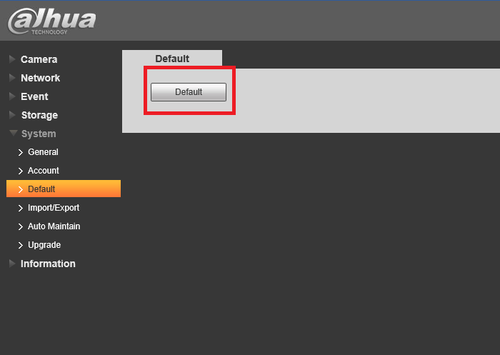
7. Try defaulting camera settings.
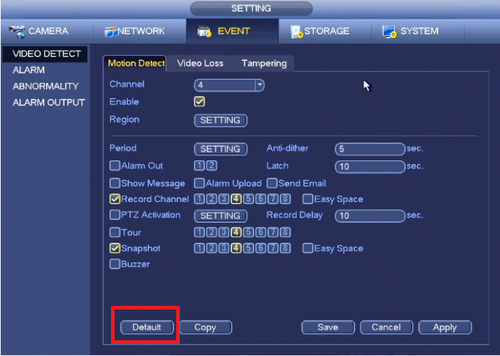
8. If it is an IP Camera login in via web and try defaulting from there to see if defaulting fixes the issue.
9. Ensure enable and record is checked off applied and saved.
10. Ensure the schedule is set for motion recording.
Unable to Playback Recordings
There are following possibilities:
HDD
Ribbon
Add Comment