

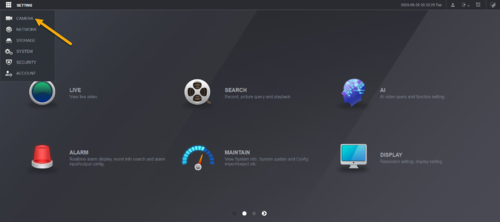
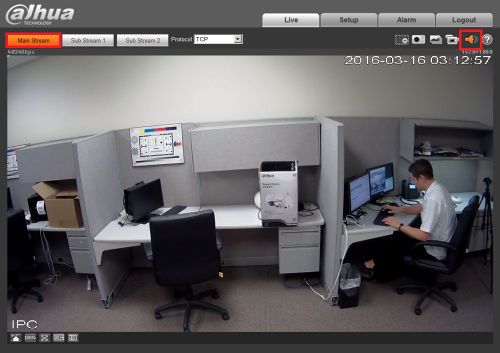
Dahua NVR Troubleshoot All Series, Network Video Recorder (NVR) is a specialized computer that records security video surveillance footage in digital format to a hard drive. Because the NVR does not have video capture capability, video is typically processed and encoded from the surveillance IP or CCTV camera and transferred to the NVR for storage via ethernet or WiFi network. NVRs are typically employed within IP video surveillance systems.
Disable audio recording on Dahua Recorder
Description
This article is to show how to disable audio function in Dahua IP camera that connected to Dahua NVR.
Video Instruction
Step by Step Instruction
1. Login to Dahua recorder from local system interface.
2. Under Settings, click on Camera.
3. Go to Encode.
4. Select the camera channel.
5. Click on More.
6. Click on the toggle to turn off Audio. Click OK.
7. Click Save.
Dahua NVR Troubleshoot All Series
Read Also : Tuya Camera User Guide Ultimate Manual
Disable audio on Dahua IPC that connected to Dahua NVR
This article is to show how to disable audio function in Dahua IP camera that connected to Dahua NVR.
Video Instruction
Step by Step Instruction
Step by Step Instructions
1. Login to Dahua NVR Web GUI using Internet Explorer.
2. Click on Settings > Camera.
3. Click on Camera list (Some recorder will label it as Registration)
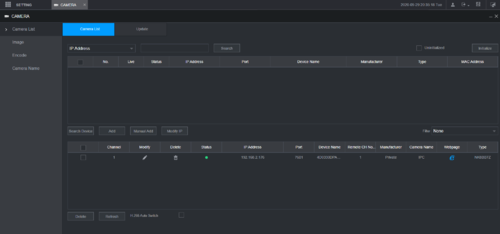
4. Find the camera channel you want audio to be disable, click on E Internet Explorer icon.
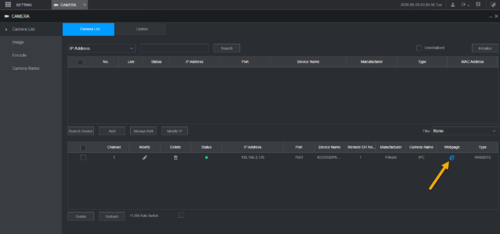
5. It will take you to the login page of Dahua IP Camera. Login with Camera credential.
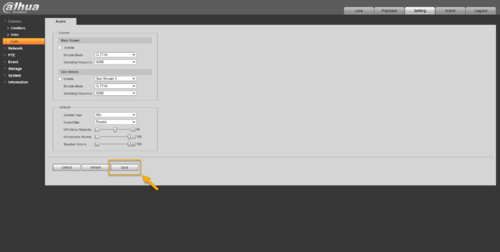
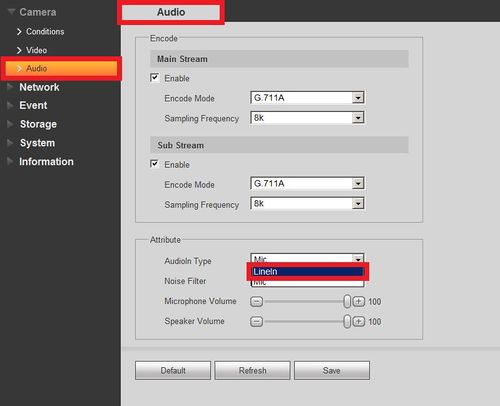
6. Go to Settings > Camera > Audio. By default the Audio settings is enabled.
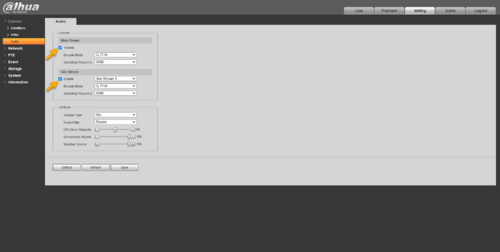
7. Click on the checkmark to uncheck on both main and substream.

8. Click Save.
No Audio from Live Feed
There are following possibilities:
1. Make sure your audio on the computer or television is enabled and working by playing music or watching a video with audio online. You should see this audio meter change when playing music or video on the computer/television.

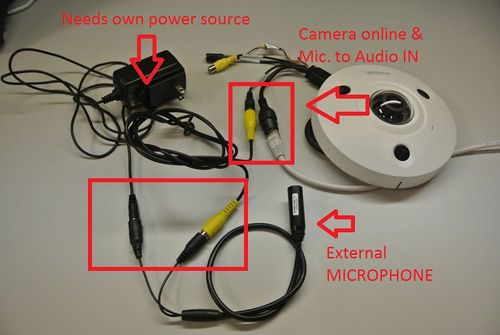
2. Once you have confirmed your audio is working on your speaker, and if you still can’t hear from your Live Feed, check your connections. If you are using an external microphone that plugs into the camera, please make sure you are supplying power to since the camera does not. See picture below:
3. If your connections and power are in order but you still cannot get audio from your live feed, log into your IP Camera or NVR and change the following settings.
4. If you are accessing your audio feed from a computer also make sure you have the speaker symbol enabled to enable audio from the Live Feed.
There is Audio from Live Feed, No Audio During Playback
There are following possibilities:
1. Make Sure your camera with a microphone is working via live stream, please follow the NoAudio guide for details.
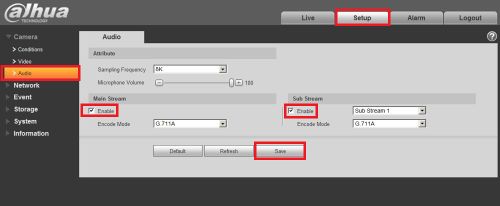
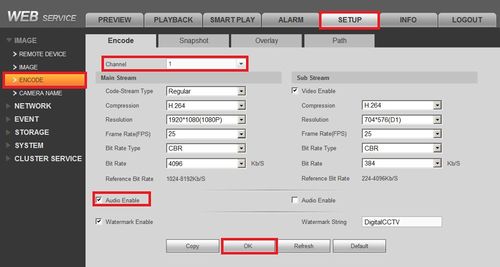
2. After ensuring you are receiving an audio feed, log onto your NVR and make sure your encoding setup is correct (Setup>Image>Encode>) and make sure your are on the right channel where the camera has a working microphone. Now make sure audio is enabled for either or both the Main Stream and Sub Stream (whichever you are recording on)
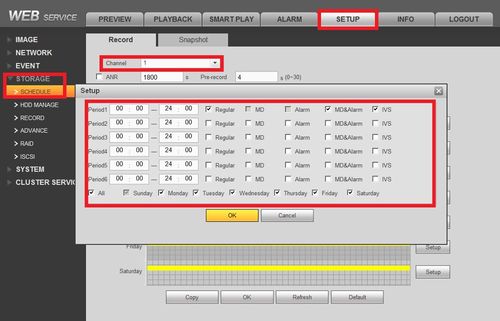
3. Also make sure your camera is scheduled to record during specified operation.
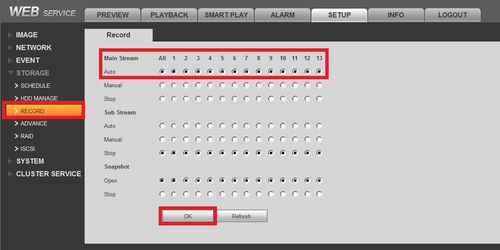
4. Also make sure your camera is set to record
5. Now playback a recording of a camera that had picked up audio, you can also simulate this by making noise by the microphone and playing that segment back. Also make sure that the Volume button is not on mute and is turned all the way up during playback.

There is no HDMI output.
Video Loss 1 Camera
There are following possibilities:
Video Loss on Multiple Cameras
There are following possibilities:
Camera Feed is Blurry or Distorted
There are following possibilities:
Video is distorted when searching local records.
There are following possibilities:
Explanation:
1. If Video quality setup is too low then reconfigure video quality setup.
2. If Program read error, bit data is too small. There is mosaic in the full screen. Please restart the DVR to solve this problem.
3. If HDD data ribbon error then replace ribbon.
4. If HDD malfunction then replace HDD.
5. If DVR hardware malfunctions then replace hardware.
Remote control does not work.
There are following possibilities:
Explanation:
1. If Remote control address is not correct then find the correct address.
2. If Distance is too far or control angle is too small then shorten the distance or fix control angle.
3. If Remote control battery power is low then replace battery power.
4. If Remote control is damaged or DVR front panel is damaged then replace remote control or DVR front panel.
System does not boot
There are following possibilities:
NVR Randomly Rebooting or Shutting Down
Issue: NVR Randomly Rebooting or Shutting Down
There are following possibilities: Explanation:
1. If Input voltage is not stable or it is too low, then change the power supply and cable.
2. If HDD malfunction or something wrong with the ribbon, then replace the HDD or the ribbon.
3. Button power is not enough, then add more button power.
4. If Front video signal is not stable then check and adjust front video signal.
5. If Working environment is too harsh, too much dust then clean it.
6. If Hardware malfunction then replace hardware.
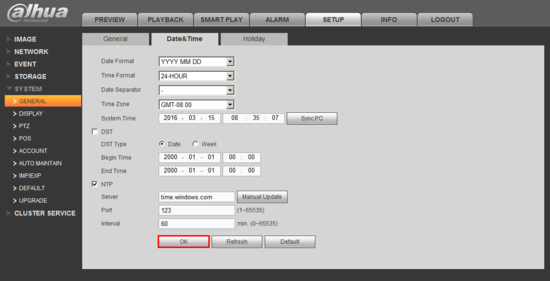
How to set the date and time
Time display is not correct.
There are following possibilities: Explanation:
Step by Step Instructions
1. Make sure the “Time Zone” is set correctly.


GMT stands for Greenwich Mean Time.
2. Setup DST, if applicable.
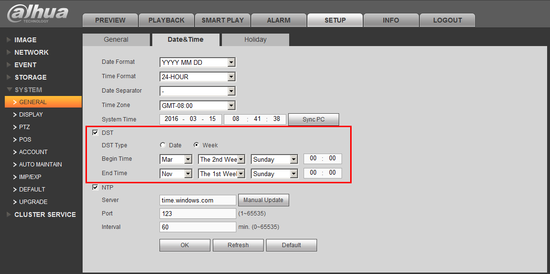
3. “Sync PC” if all else fails.
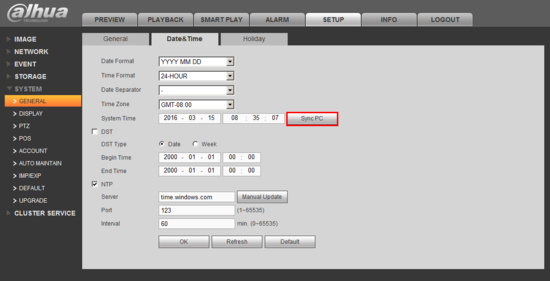
4. Click, “OK” to save your changes.
Burn error /USB back error.
Explanation:
1. If Burner and NVR are in the same data cable, then separate them.
2. If System uses too much CPU resources. Then please stop record first and then begin backup.
3. If Data amount exceeds backup device capacity which may result in burner error. Then please delete data.
4. If Backup device is not compatible, please change backup device.
5. If Backup device is damaged, please change backup device.
Add Comment