

DVR/NVR Setup Guide (for use with TetherX)
Tested Vendors
You can connect to any NVR, DVR or Camera that has ONVIF or RTSP. This means you can connect your TetherBox to the vast majority of products manufactured since 2007.
Some of the vendors we have tested and worked with frequently include Axis, Sony, Samsung, Panasonic, D-Link, Vivotek, Lilin, Edimax, Cisco, Sunell, AVTech, TVT, Grandstream, Canon, Hikvision, Dahua and many others.
Part 1 of 2: Configure your DVR
Many DVRs/NVRs will work out of the box with the default configurations. If for any reason your DVR/NVR is not working, please follow these instructions. The example screenshots feature a Hikvision analogue DVR, the options on your specific DVR may differ.
Step 1 of 2: Check RTSP is switched on and set to port 554 (usually under Configuration -> Network -> RTSP)
Note: There might be a separate RTSP username/password under Users on some DVRs. If there is, please make note of it.
Step 2 of 2: Camera quality is set as desired.
Note: Whatever quality you set on the DVR will be reflected on the TetherBox. If the DVR is set to 704×576, the TetherBox will record in this resolution as well.
Warning: If your DVR has H.265, you may want to switch to H.264 or H.264+ (as pictured). This is optional but ensure maximum compatibility with browsers, mobile phones, tablets and other devices.
Optional Step: Enable ONVIF (if your DVR has this option)
Part 2 of 2: Add Your DVR/NVR to the Timeline
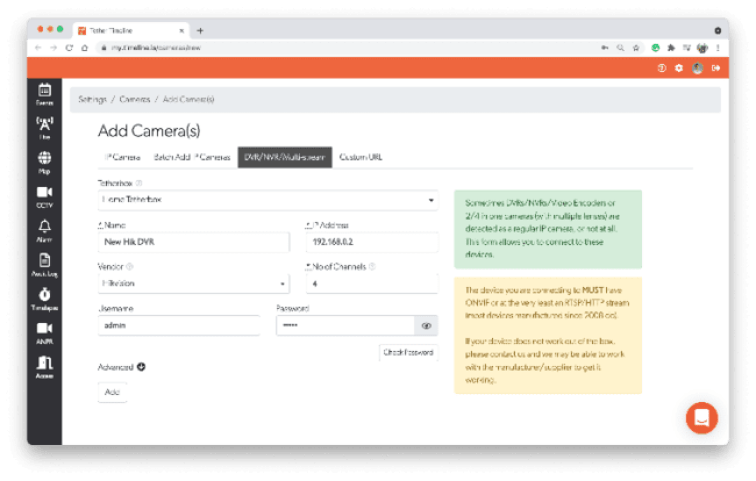
Step 1 of 1: Add the DVR to TetherX
Note: Please make sure to use the “Check” button to ensure the password is correct before processing.
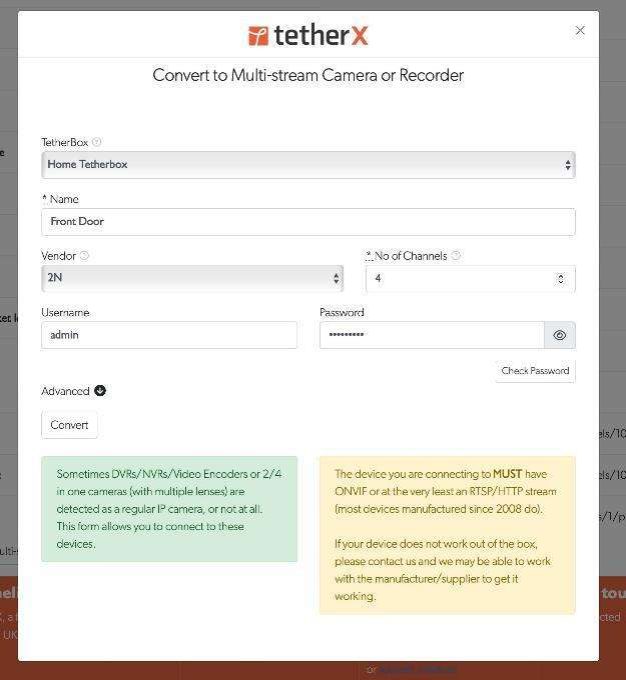
Note: If your vendor is not on the list, try selecting “Other”
Note: Please make sure to use the “Check” button to ensure the password is correct before processing.
Your DVR/NVR is not listed?
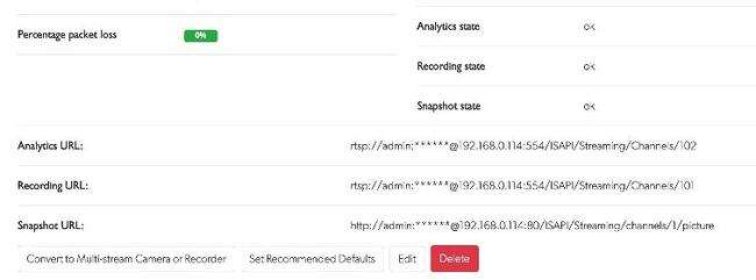
If DVR is not on the list, you will need to find the correct RTSP URL for your DVR. You can enter this URL under the “Custom URL” tab of the “New Camera(s)” dialogue.
Note: You can normally find this in the DVR/NVR manual, you may need to contact the supplier or manufacturer if you cannot find it.
If you are not able to find this information, please reach out to us and we may be able to help!
rtsp://[user]:[password]@[ip]/cam/realmonitor?channel=[physical-channel]&subtype=[stream-id]
e.g.
rtsp://admin:pass@192.108.1.108/cam/realmonitor?channel=1&subtype=1
rtsp://[user]:[password]@[ip]/streaming/channels/[physical-channel]0[stream-id]
e.g. for camera 3:
rtsp://admin:12345@192.168.1.3/streaming/channels/301
e.g. for camera 10:
rtsp://admin:12345@192.168.1.3/streaming/channels/1001
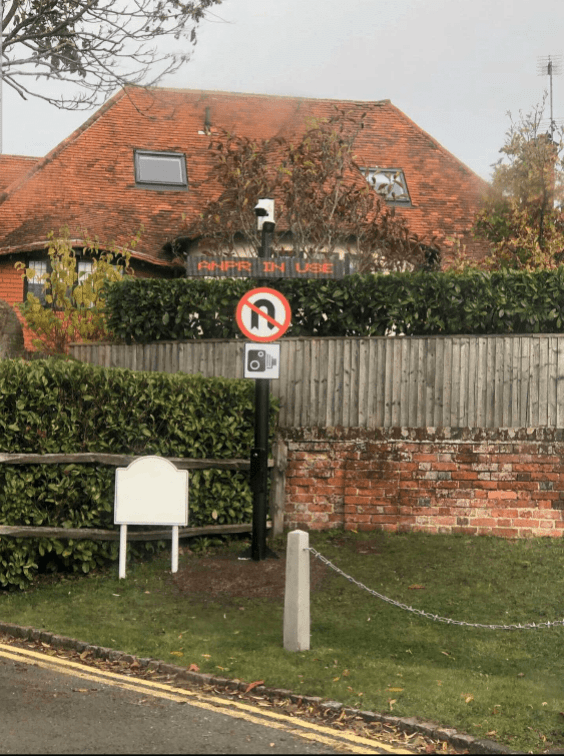
Adding an ANPR LED Matrix Display
Compatibility
We support all displays that use the HX & HXE SIGN PROTOCOL v4.2.
The main difference between compatible displays is the physical size and how many characters can be displayed at one time.
While the displays usually support both a Serial and Ethernet connection, we recommend using the Ethernet connection for maximum stability.
For example, one popular choice for ANPR matrix displays is Spectra Displays. Please ensure the appropriate HX/HXE version of the display is purchased (the CPower versions are not compatible).
Note: TetherX are not affiliated with Spectra.
Setting Up in TetherX
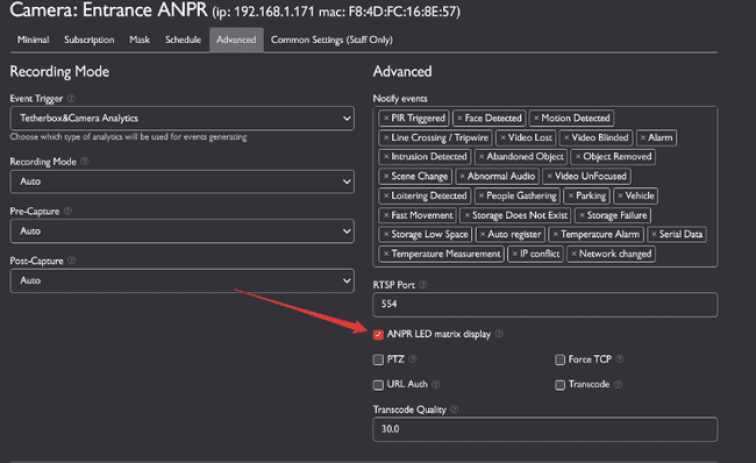
3. Open Admin > TetherBoxes > Edit the relevant TetherBox > LED Matrix Display tab
4. Tick the “Enable LED matrix display” tick-box and fill in the form, for example:
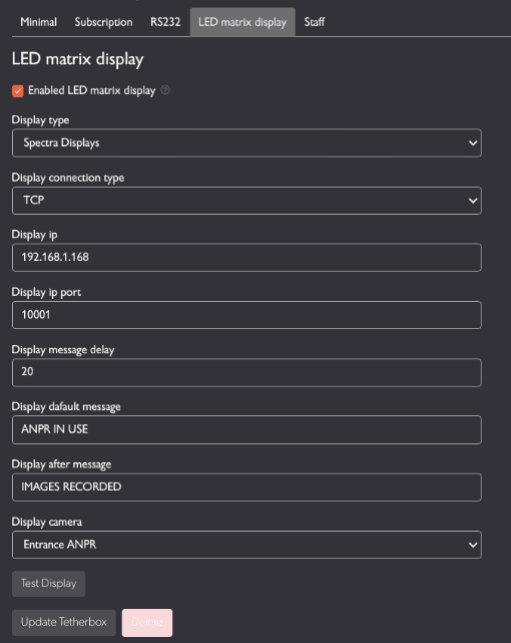
5. The Matrix Display will show the license plate for the configured number of seconds, before switching to the default messages
Limitations
If you require something that is not currently offered by this feature, please let us know and we may be able to add it. Please note there may be additional costs for development or integration.
Some currently limitations include:
Note: Some manufacturers may have versions of the same display with and without the HX/HXD protocol support.
Example Installation
In this example of a live TetherX installation, it is configured to:
How to set up email/push notifications?
You can adjust your user account to select which push or email notifications you wish to receive. If you are interested in setting up camera analytic notifications, please see our enabling camera analytics article.
To adjust your own account notifications follow these three steps:
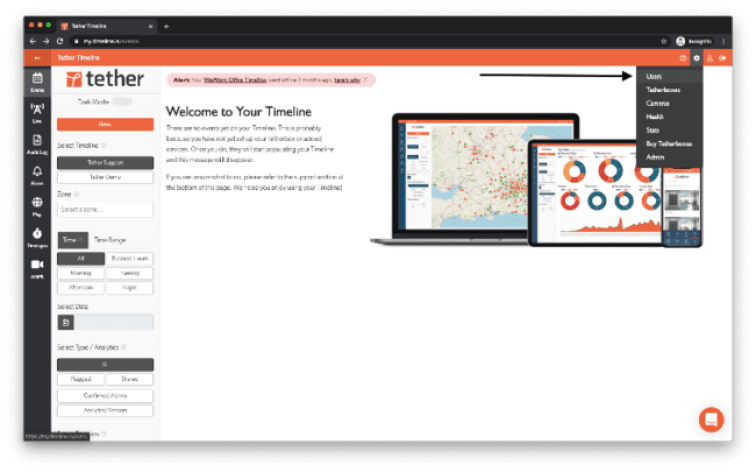
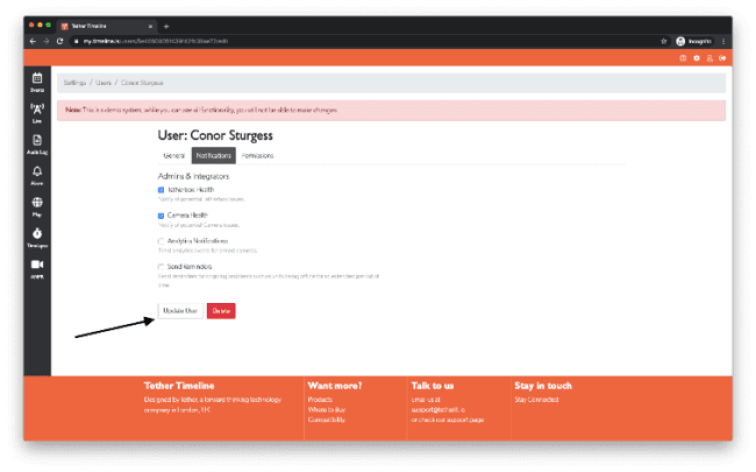
1) Click the ‘Person Icon’ located at the top of the page
2) Select the notifications tab.

3) Tick the notifications you wish to receive. Click ‘Update User’ to save and exit.

To adjust other user accounts notifications, follow these four steps:
2) Search for the user in the search bar and select the ‘Pen Icon’ to edit.
Note: Make sure the Timeline filter is set to ‘All’

3) Select the notifications tab.

4) Tick the notifications you wish to receive. Click ‘Update User’ to save and exit.
How do I update Hikvision firmware remotely for my TetherX installation?
If your system was installed by one of our security installation partners please contact them to update your cameras. If you would like to update your Hikvision devices yourself please follow the guide below.
Note: the UK firmware is different from the US firmware. For UK firmware, please follow use the UK Downloads page.
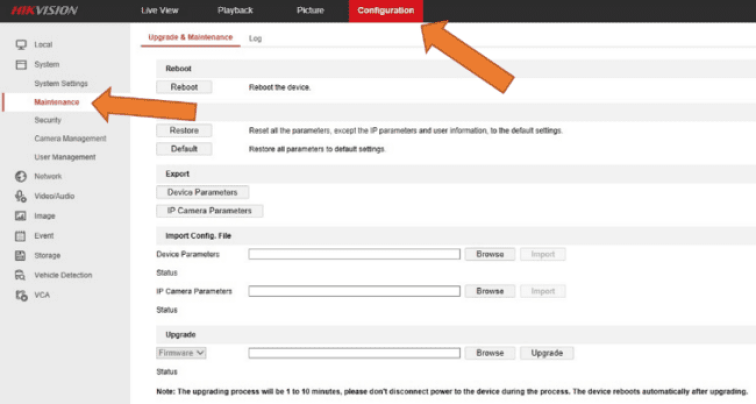
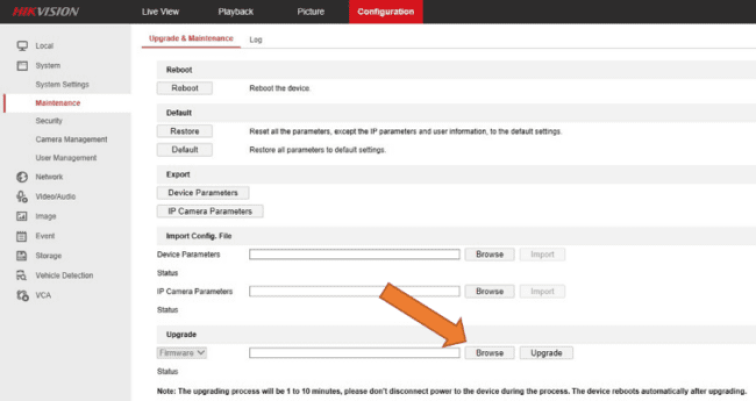
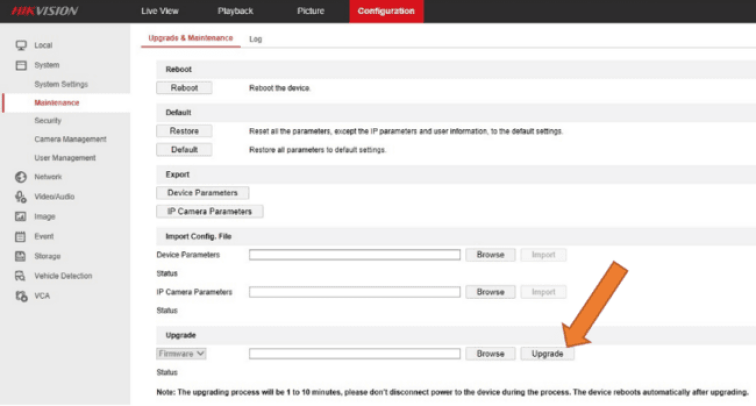
The actual upgrade will take up to 10 minutes and the device will automatically reboot at the end of the upgrade process.
This video from Hikvision Technical Support shows the upgrade process:
Add Comment