

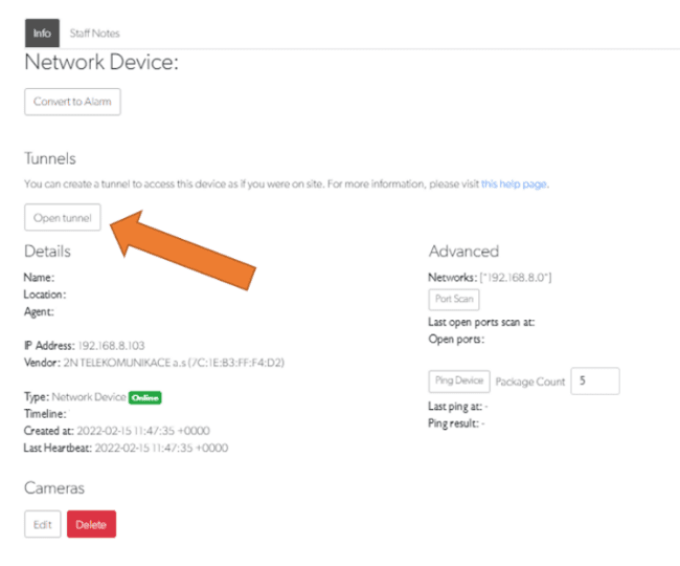
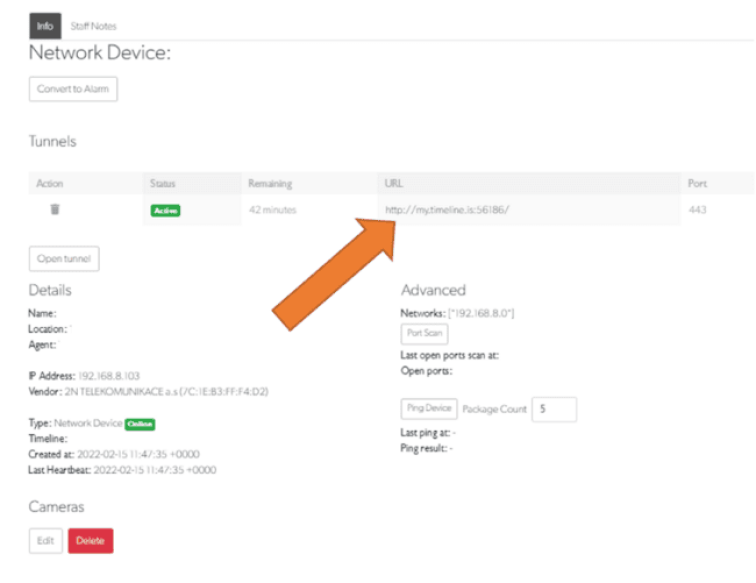
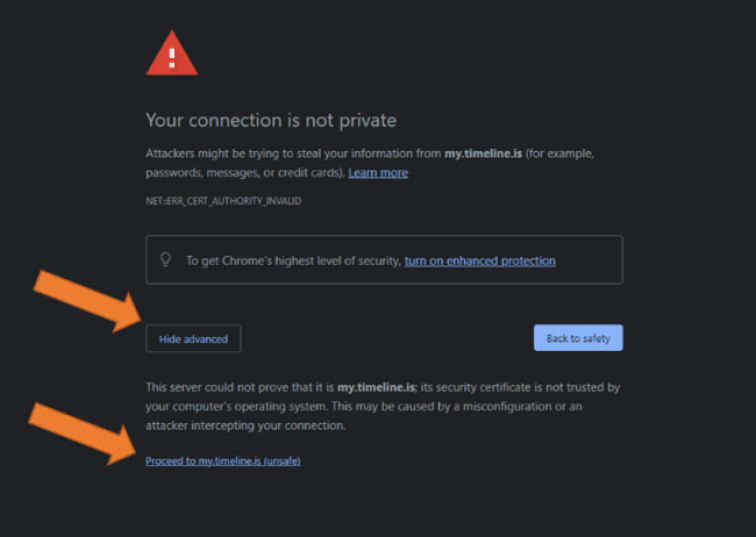
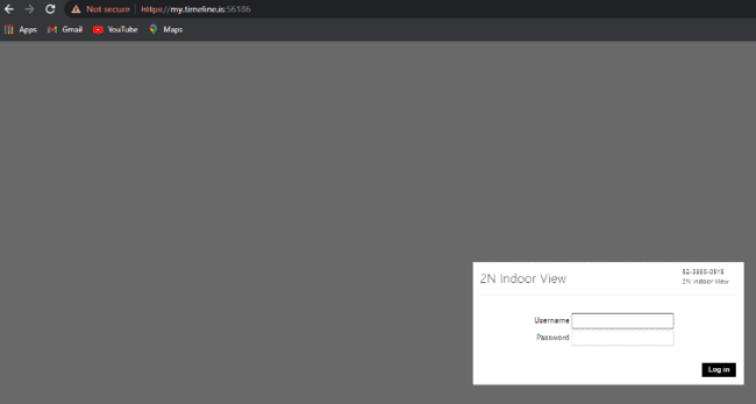
How do I tunnel to an N2 Intercom?
How to create tunnels to N2 intercom devices within TetherX
Setup built-in analytics on Hikvision camera (for use with TetherX)
Example for Configuring a Line Crossing Event
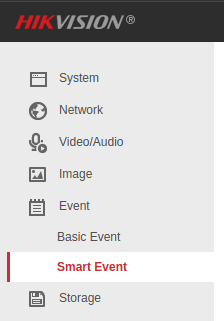
1. Log into your camera using the tunnel created and click Configuration

Note: Layouts may vary depending on the manufacturer and firmware/model of the camera.
2. After clicking configuration click Event -> Smart Event
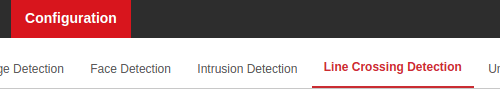
Note: For this example, we will be enabling Line Crossing Detection.
3. Click the Line Cross Detection tab
4. Draw the virtual line where you want the camera to automatically begin recording an event if crossed
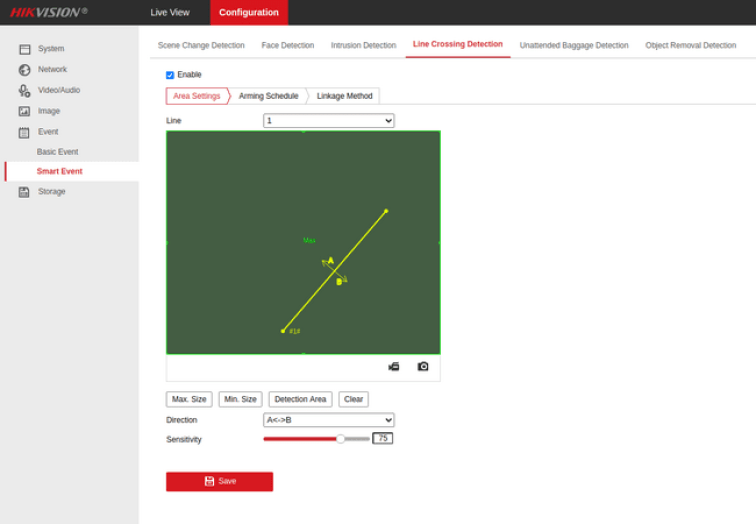
5. To complete the setup, click the Enable checkbox at the top followed by the Save button at the bottom of the screen
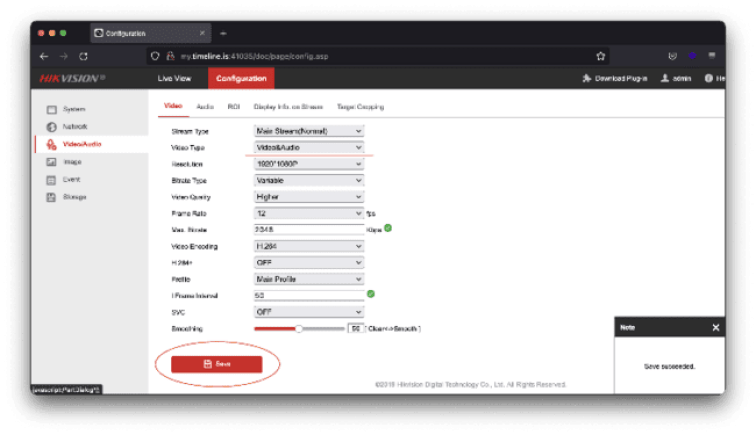
Audio Stream on Hikvision camera Setup Guide
Enabling audio stream on a Hikvision camera to record events with sound
1. Open your camera web interface or create a tunnel (How do I tunnel to a device?)
2. Go to the Configuration page, select the Video / Audio tab:

3. In the drop-down list “Video type” select the item Video & Audio:
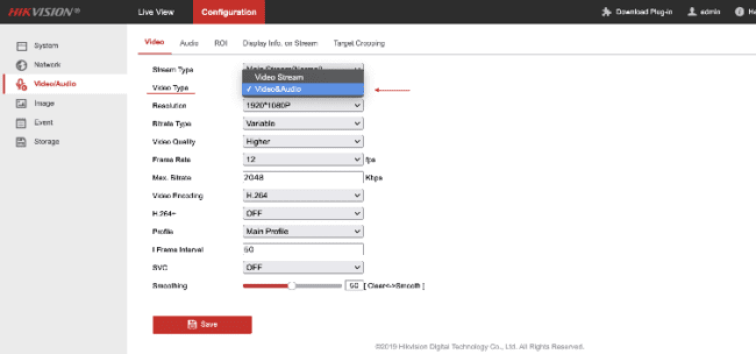
4. Click the “Save” button:
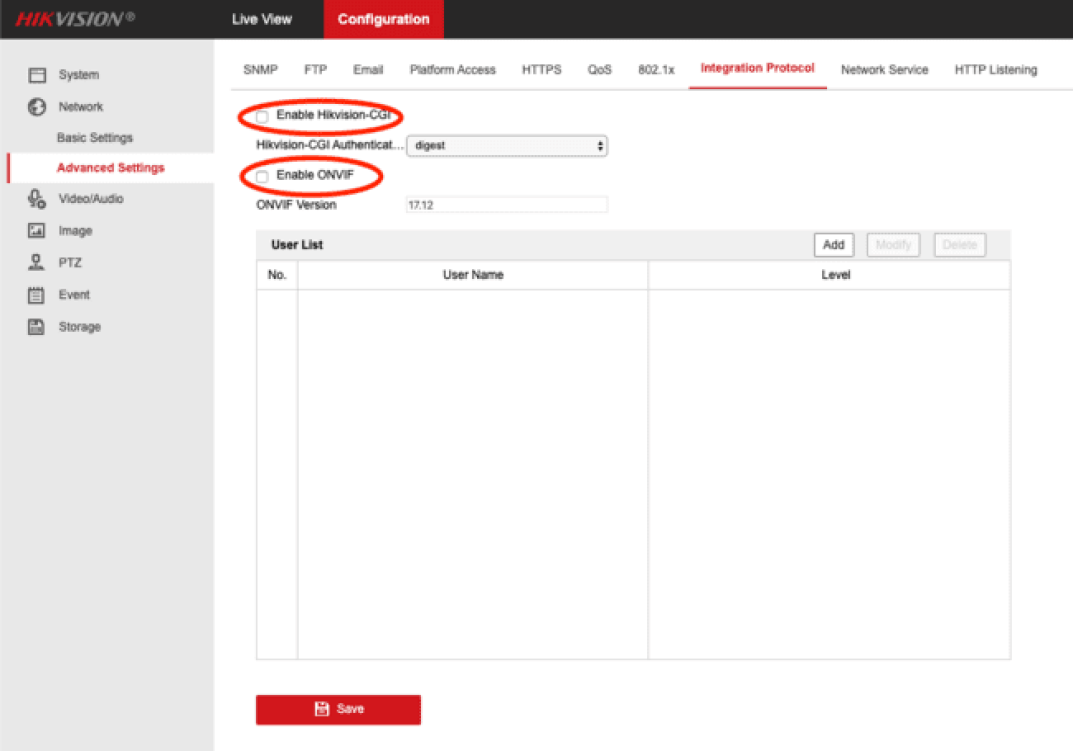
Hikvision Camera ONVIF Setup Guide (for use with TetherX)
Enabling ONVIF allows PTZ, automating camera configuration and more
Introduction
Enabling ONVIF and Hikvision CGI allows the TetherBox to communicate with the camera and unlocks certain functionality including PTZ Controls, the ability to reconfigure resolution/bitrate, the ability to monitor the camera’s internal health stats and more.
It is recommended that Hikvision CGI and ONVIF are both enabled. Hikvision used to enable these by default but they are disabled in recent firmwares. If these are disabled on your camera, please follow the steps below.
Step by Step
Please Note: Your specific camera model and firmware version may be different to what you see in the screenshots. Please refer to your camera manual if you are not able to find the relevant options.
1. Log in to your camera’s admin interface. You can do this by entering the camera’s IP address if you are on-site, or you can Tunnel to the camera remotely.
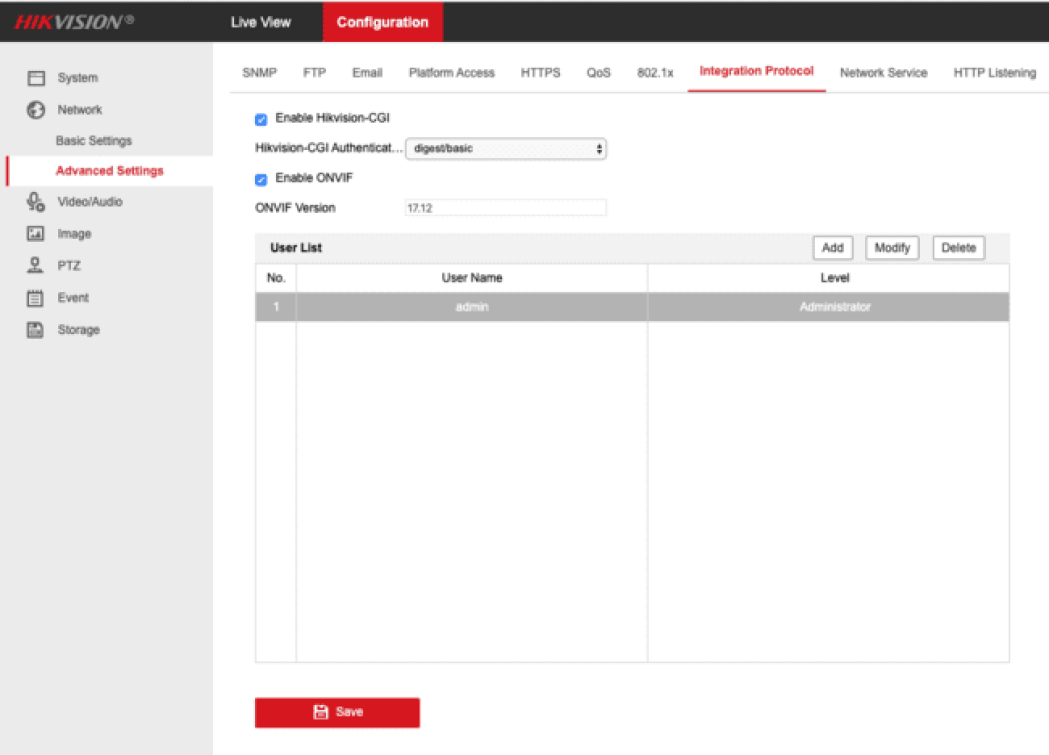
2. Tap on “Configuration” > “Advanced Settings”
3. Tick “Hikvision-CGI” and “Enable ONVIF”, followed by “Save”
4. Tap on “Add” to add a new user
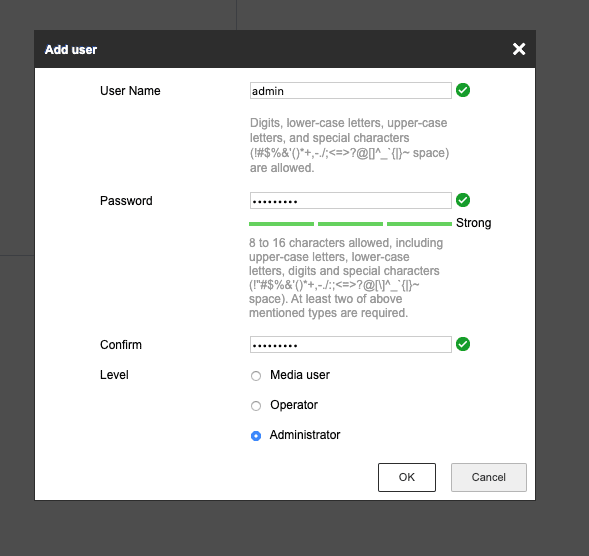
5. Fill in the same username/password you have configured in the Timeline
6. You should see the new user in the table
Dahua Camera Setup Guide (for use with TetherX)
Using TetherX with Dahua cameras
To achieve better quality live view and event/time-lapse snapshots with TetherX, we recommend the following settings for Dahua cameras.
Note: You may find the tunnelling feature useful in order to access the camera settings remotely.
In the Camera Settings
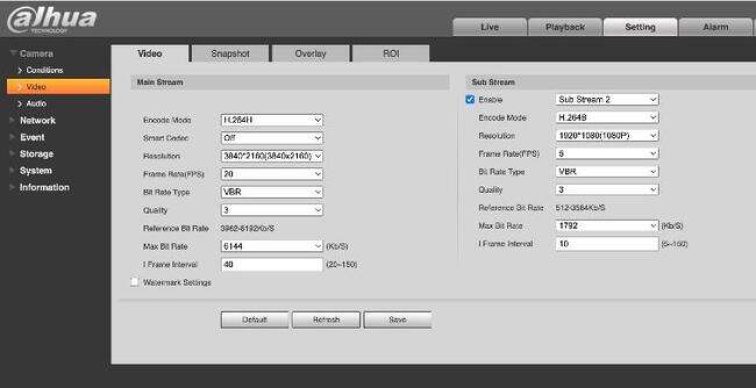
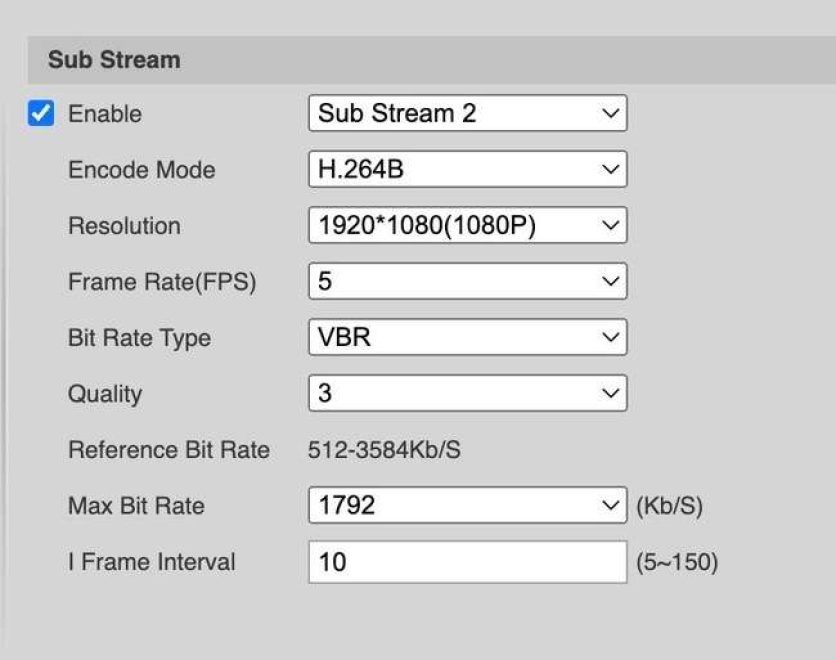
Note: If Sub Stream 2 is not available, Sub Stream 1 will work too, but usually has a lower resolution – in this case you can skip the TetherX steps below.
Note: Some models may not have the Code-Stream Type option, which is not essential.
Inside TetherX
Please note if you have not enabled Sub Stream 2 above, please skip this step:
/cam/realmonitor?channel=1&subtype=2
Mobotix Camera Setup Guide (for use with TetherX)
Using TetherX with Mobotix Cameras
Mobotix Move Range
The Mobotix Move range should work out of the box without any additional steps using our Dynacolor integration. The rest of this document talks about the rest of the Mobotix camera range.
You can find more details about the Move range here.
Other Mobotix Cameras
To use Mobotix cameras with TetherX, you need to enable RTSP/ONVIF integration on your Mobotix camera.
1. Using a web browser, log in to your camera via the IP address, username and password created when you activated your camera.
Note: You can use our tunnelling feature if you are setting this up remotely.
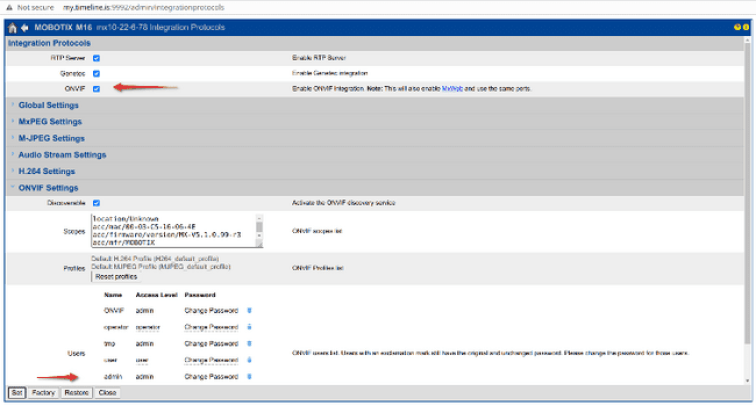
2. Admin Menu > Camera Administration > Integration Protocols for video streaming ( RTP server configuration )

3. Tick RTP server and ONVIF Integration checkboxes and press “Set”
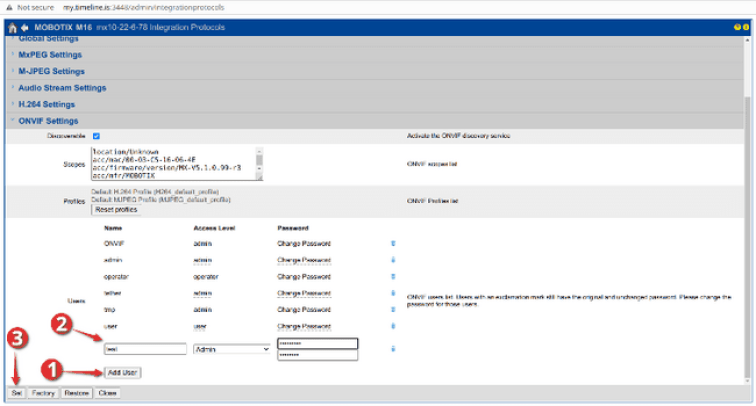
4. Manually create an ONVIF user.
The username and password must be different from any other user.
The ONVIF user cannot be used to login to the web interface
5. Confirm that you can receive video in a player such as VLC by using the following link pattern:
rtsp://<username>:<password>@<ip_address>:554/mobotix.h264
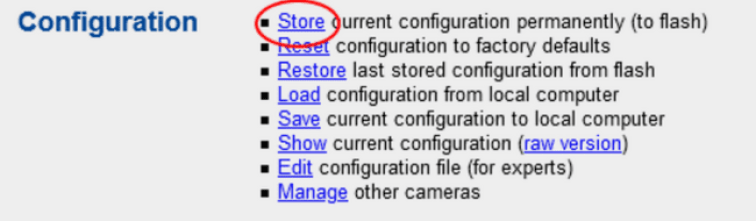
6. Return to the admin menu > configuration > store current configuration permanently.
Note: if this is NOT done, when the camera reboots all changes will be lost and the camera will no longer record!
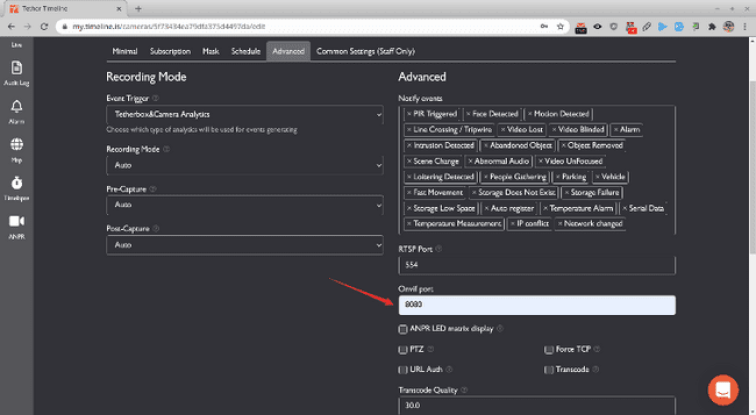
7. Mobotix cameras use a non-standard TCP port ( 8080 ) for ONVIF protocol.
This needs to be set in the TetherX interface to allow receiving events from the camera. https://my.timeline.is/cameras click on the edit icon on the Mobotix camera entry.

8. Open the Advanced tab, set the ONVIF port to 8080 and save your changes by clicking “Update Camera”.
9. Test the events and recording works as programmed

Add Comment