In this guide, we will show you how to set up camera fusion via recorder.
Prerequisites:
- A fusion-enabled recorder.
- Compatible Wi-Fi camera(s), see all compatible cameras in the Fusion’s FAQs page.
- A router
- A monitor
- A mouse
- HDMI cable
- Ethernet cable
- Access to the internet
IMPORTANT:
- Make sure your recorder and Wi-Fi camera are on the same network.
- Make sure you are logged onto the same Lorex account to setup the recorder and Wi-Fi camera.
Part 1 – Preparation
- Make sure your recorder and Wi-Fi camera are powered ON.
- Check that the recorder and Wi-Fi camera are Fusion-enabled (i.e., compatible). Verify your recorder and camera’s model number then check here to see if they are compatible.
- Connect your recorder to the router using an Ethernet cable.
- Connect your recorder to the monitor using an HDMI cable.
- If you have not done so yet, set up your recorder now via Setup Wizard.
When you create a secure password for the recorder write down the password as you will need it shortly. Note: This is the device password for your recorder, it is not your Lorex account password.
- Connect your Wi-Fi camera to the Lorex Home app. Refer to the product documentation, as needed.
To connect your Wi-Fi camera to the Lorex Home app:
- Launch the Lorex Home app.
- Tap the
 icon on the Devices screen.
 - Scan the QR code on the camera using your mobile device’s camera. Note: If your mobile device cannot scan the QR code, tap Manually enter Device ID.
- Create a secure password for the device then write down the password as you will need it shortly. Note: The device password is for your camera, it is not your Lorex account password.
- Follow the in-app instructions to successfully add your Wi-Fi camera to the Lorex Home app.
- (Optional) Connect your recorder to the Lorex Home app. Refer to the article Fusion Collection – How to add the recorder to the Lorex Home app, for more information.
Part 2 – Connect your Wi-Fi camera to the recorder
- Go to Main Menu > Camera Menu > Registration.
- Enter the recorder’s device password.
- In the Camera Registration settings, click Device Search.
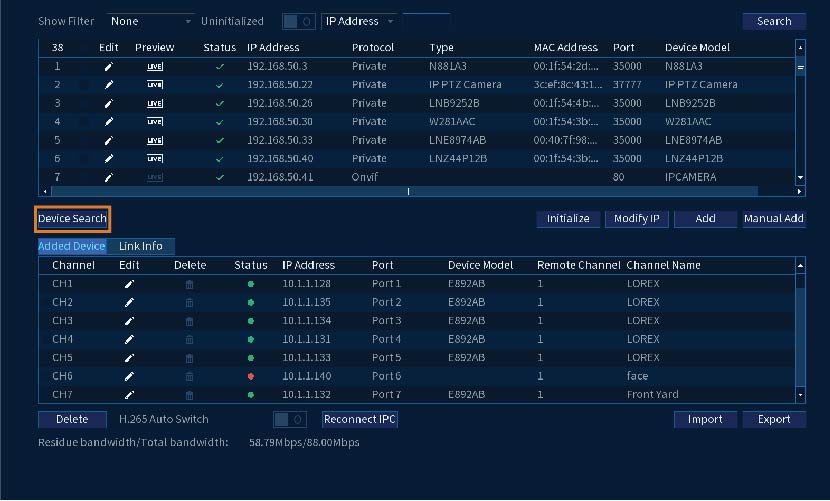
- Now, the camera(s) that you have previously added to the Lorex Home app should be detected and appear right away in the Device Search section.
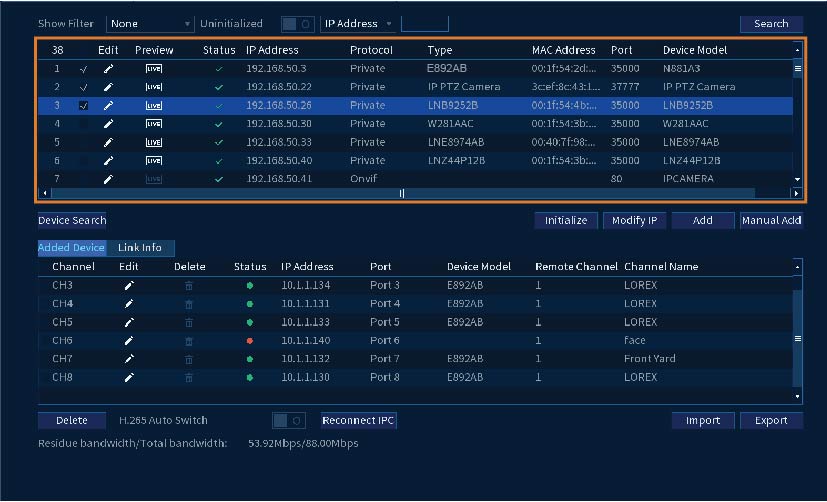
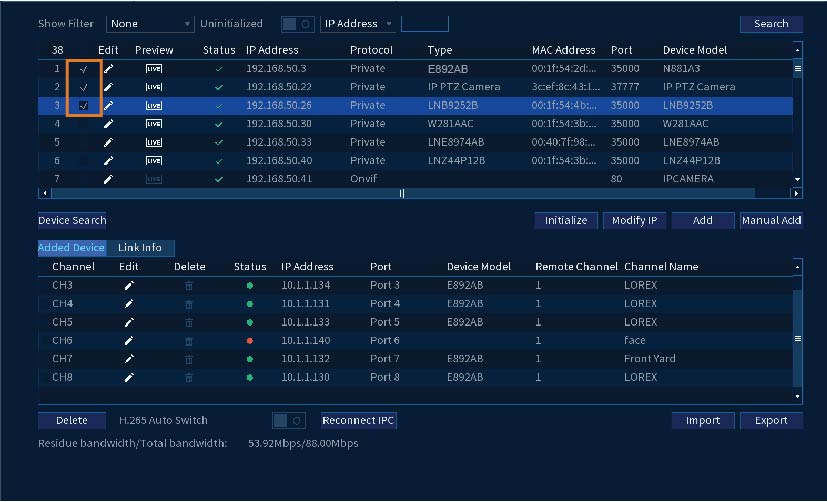
- Check the checkbox that corresponds to each device.
- Click Add.
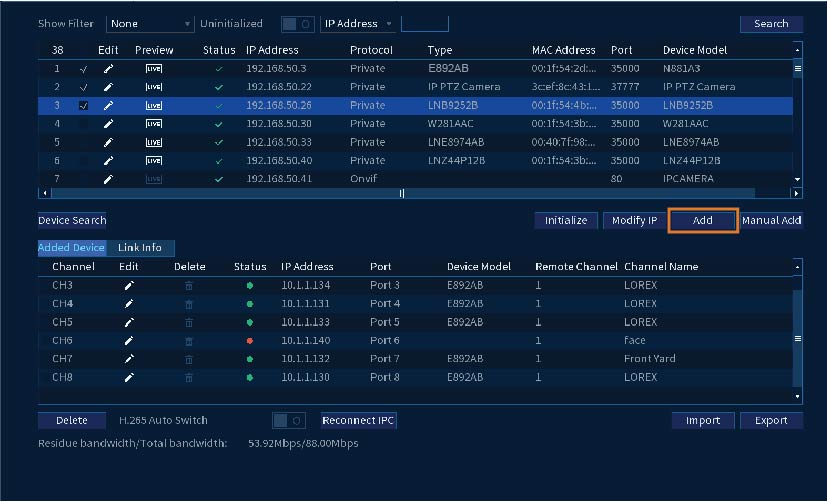
- Now, the device should appear in the Added Device section.
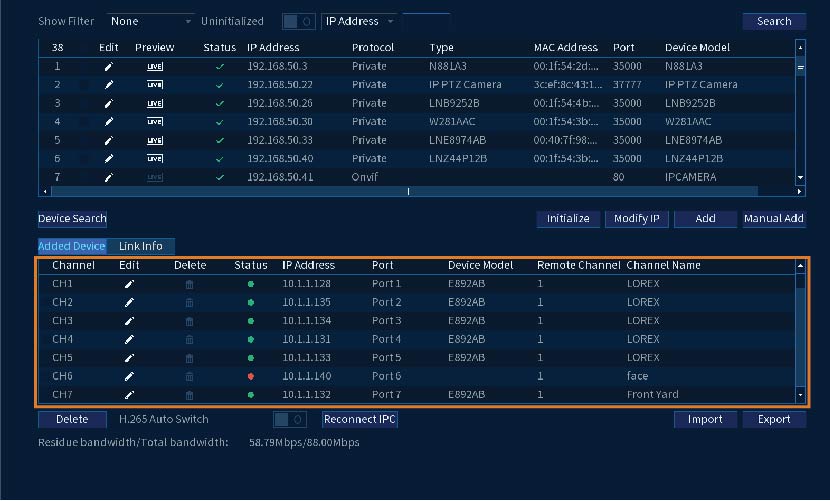
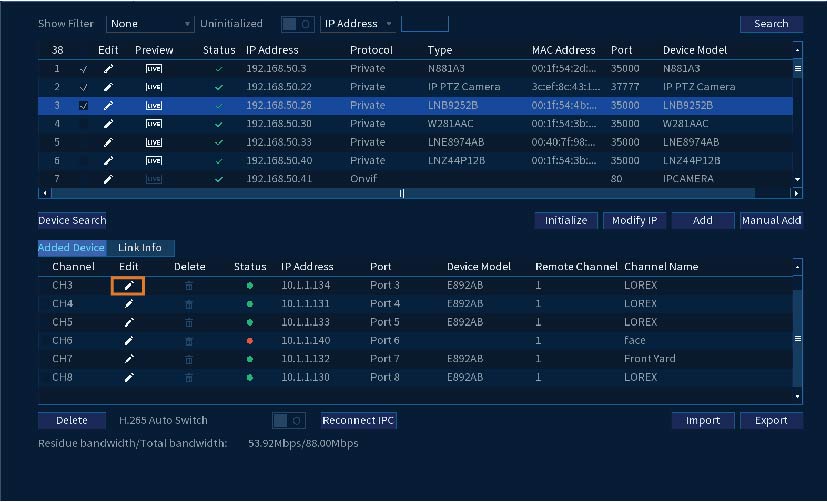
- In the Added Device list, click on the pencil icon under Edit to enter the device password.
- Click on the Password field, then enter the device password for your camera.
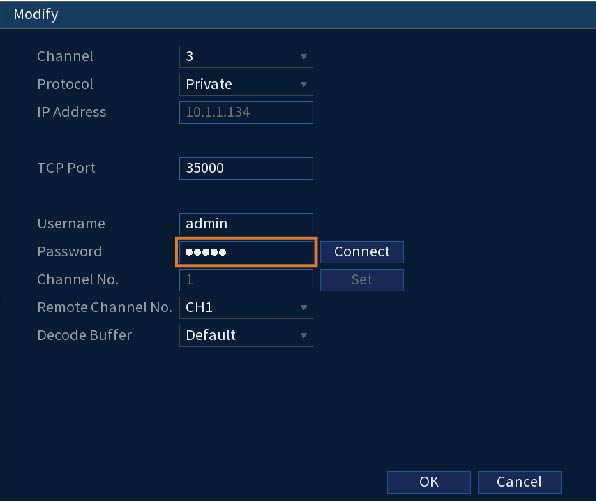
WARNING: The camera will lock itself if you enter the wrong password. If this happens, please power cycle the camera and go back to Step 1.
- Click Connect, then click OK. Your camera’s Live View should appear right away.
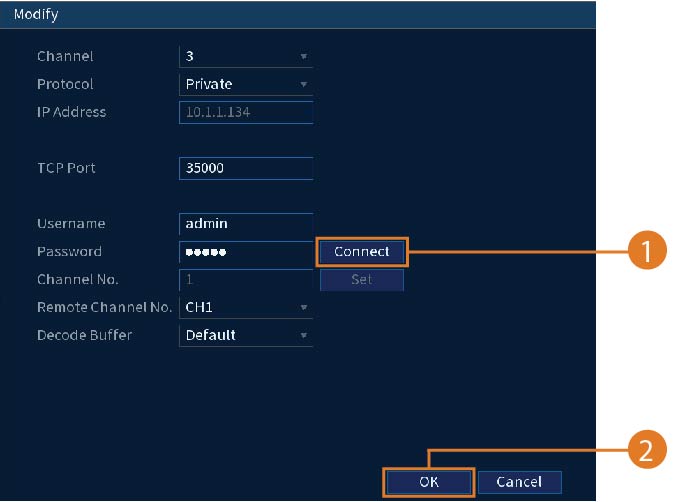
Congratulations! You have successfully fused your Wi-Fi camera with your recorder. You can now access your Wi-Fi camera on both the recorder and the Lorex Home app.
Recommendations
- Remember to update the recorder to the latest firmware. Check out this FAQ on how to upgrade your recorder to the latest firmware version.
- In the Lorex Home app the camera will appear twice–once as an individual camera and again as a camera connected to the recorder. We recommend that you disable notifications for the individual camera so that you do not receive duplicate notifications from the same camera.
To disable notifications:
- Launch the Lorex Home app.
- At the Devices screen, go to the device settings for the camera by tapping the
 icon on the top-right.
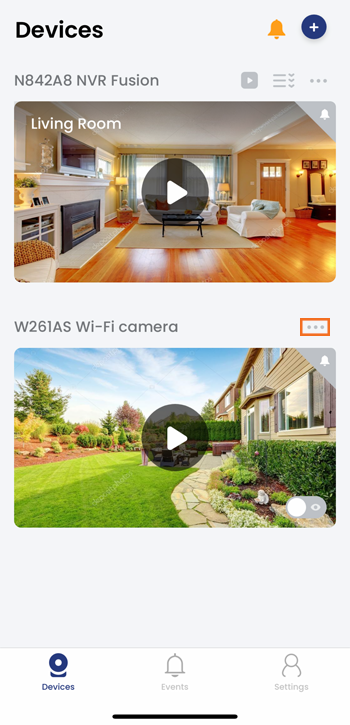
- Tap Notifications, and then tap the
 icon to disable notifications.
How to add the recorder to the Lorex Home app
As part of the Fusion Collection, you can now add your compatible recorder to the Lorex Home app.
This article applies to the following recorders: N841, N842, N843 and N861.
Prerequisites
For this procedure, you must connect a monitor to your recorder using an HDMI cable and a mouse to one of the USB ports on your recorder.
Step 1. Log in to your recorder.
Step 2. Right-click on the mouse, then click Info to reveal the QR Code of your recorder.
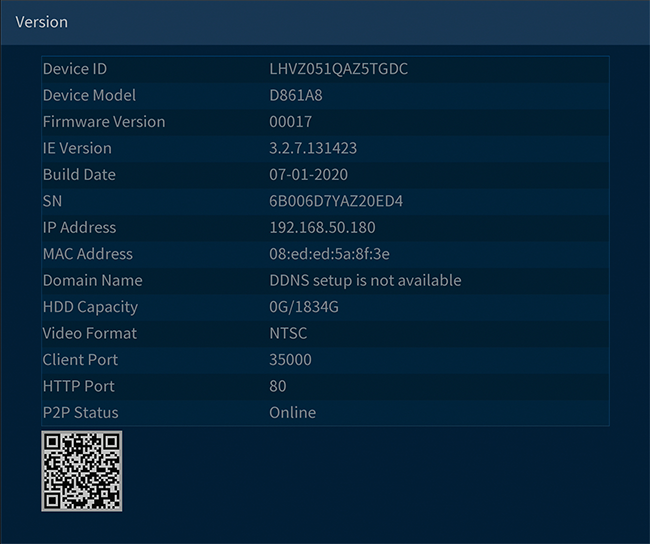
Step 3. Now grab your smartphone and launch the Lorex Home app and tap + to open your smartphone’s camera.
Step 4. Using your smartphone’s camera, scan the QR Code of your recorder.
Step 5. Follow the on-screen instructions on adding the recorder to the Lorex Home app.



hello nice sharing thanks
my recorder is not working
please provide support for me i leave my email address
I can’t upload
hi how can i do
I am having trouble with the installation
can you help me please
I really love you
I can’t upload
problem not solved thanks
problem not solved thanks
my recorder is not working