Here are a few of the problems of the blink mini camera and troubleshooting against them is in detail for the users.
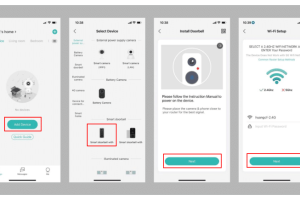
Blink Mini Camera Not Connecting To Wi-Fi
- Consider relocating your Mini closer to your Wi-Fi router if it regularly disconnects from your network. Poor signal strength is the most prevalent reason of disconnection.
- Please double-check that the password for your in-home Wi-Fi network is accurate. This is normally displayed on the router label, although it might also have been set during router configuration. If you’re not sure if you’re using the right password, try connecting a new device to your Wi-Fi network (laptop, tablet, or phone). If your device is already connected to your Wi-Fi network, you can reconnect by entering the password again after detaching and forgetting the network.
- Check to see if your network is preventing access to the Mini camera. This might happen if you get a notification indicating a device is trying access but you don’t recognize the name. Instead of the Blink product name, radio chips are occasionally used to identify Blink devices. The following are some well-known identifiers that you should allow if they are detected:
– Generic Doorbell Camera
– Generic Security Camera
– My Simple Link
– Texas Instruments
– < no title >
- Do you use VPN on your mobile device? If so, please disable VPN and proceed with setup. You can enable your VPN after you complete setup.
- Make certain your router is broadcasting a 2.4 GHz network since Blink cameras cannot connect to a 5 GHz band.
- Try restarting your router, which may resolve your connection problem.
Blink Mini Camera Offline
If you see a “Camera Offline” message that says “Your Blink Mini is offline,” it implies the Blink servers can’t communicate with the camera anymore. There are a few actions you may take to get back in touch. Please contact Technical Support if these instructions do not reconnect your camera.
Instead of batteries, the Blink Mini small camera is powered by a direct connection to a USB standard power adapter. The power cable must be securely attached to a 5 volt 1 Amp power source and fully plugged into the camera in order for it to work.
The camera must be linked to a 2.4 GHz Wi-Fi internet connection with upload speeds (coming out from your network) of at least two megabits per second (2 Mb/sec) at all times in order to transmit you photos and audio, even if others are using the same internet connection.
The Blink Mini is usually taken down due to a broken or sluggish internet connection.
The alert shown in the Blink app provides helpful tips. The first, is to check the Wi-Fi internet and the power supply, then check the camera power connection.
How to Fix?
- Check Wi-Fi. Ensure that you can connect to the internet, and that the password has not been changed. If the password has been changed, refer to the next step.
Rebooting the Wi-Fi router is often very effective to resolve Blink connectivity issues.
If you have rebooted your router and Blink does not connect after 3 minutes, continue. - Check your password. If the password is changed, or if you wish to use a different Wi-Fi network, tap the Change Wi-Fi button: Change Wi-Fi and follow the instructions.
If the password or network have not changed, continue. - To repeat the camera installation process, tap the Delete Camera button: Delete Camera and follow the instructions.
Blink Mini Motion Detection Not Working
When some settings limit the camera’s critical functionality, the Blink camera may not respond as expected. It’s possible that the setting was altered manually or by accident.
Before you finish, double-check each area. When the blink camera setting is not working properly, it may be restored as normal.
1) Access the Blink system and ensure the motion detection is turned on. Go to the setting where you can find the motion detection on and off button.
2) The next step is to see if the camera is turned on. It indicates that the camera has a setting where the dark “running man” next to the camera setting button may be seen.
3) In the app, look for another setting that states the entire system is armed. In the lower right-hand corner, you’ll find the setting. It should be turned on.
4) The inability to connect to a Wi-Fi network might be the source of the issue. Getting the proper signal strength will get your camera up and running again. Carry your device close to the router and attach the camera as usual to check for a network problem.
Check and output the video when you’ve finished recording it. The camera is not getting enough bandwidth if it is performing perfectly near the router with a solid network connection signal.
Either the location is out of the WIFI network’s range. Alternatively, the barrier around the camera may be blocking Wi-Fi access. You might also consider replacing your router with a high-capacity Wi-Fi device that broadcasts high-frequency radio waves.
Data may be sent between remote devices using a contemporary Wi-Fi network with high-speed internet access. Check the camera with the various routers to see whether the problem is resolved.
5) Batteries may be the source of the problem. Because they have been stored for a long period, the batteries that come with the cameras may contain a lot of power.
Replace the batteries and test the device to check whether it functions correctly. Allow the camera to remain empty on the table for a minute after removing the batteries. After some time has passed, replace the batteries and check to see whether it works correctly.
More:
- How to Set up Alexa for Blink devices
- How to set up battery powered Cameras
- Troubleshooting Physical Cameras in 3 steps
Blink Mini Camera Night Vision Not Working
Night vision is standard on all Blink Cameras. Blink cameras light an area with an infrared emitter, resulting in a black-and-white image. The intensity of the IR emitter may be changed using the Blink app’s settings.
How To Turn On Night Vision On Blink Camera?
f your default setting somehow has been changed, here is how to enable night vision on your Blink camera.
- Open the Blink app
- Click on the Camera Settings icon
The Camere Settings icon in the far right button is located above the camera image. It is to the right of the camera name and just the right of the motion detection icon (The running man).
- Scroll down to the “Night Vision” section
The Night Vision section is the fourth section down. As of writing this article, the sections are currently in this order: 1. General, 2. Monitoring, 3. Motion Detection, 4. Night Vision, etc.
- Enable the night vision by changing the “Control” option to either “Auto” or “On”
Blink Camera Night Vision Settings
There are two-night vision settings that you can adjust:
- Control (On, Off, Auto)
- Intensity (Low, Medium, High)
Blink Night Vision Control
The Blink night vision control setting is the option that determines if night vision is enabled or not. Whether it comes on or stays off.
The Control setting has three options: On, Off, or Auto.
Auto: Auto will toggle night vision on or off based on the lighting conditions.
On: On will constantly have night vision enabled.
Off: Night vision will not turn on, no matter how dark it is.
Auto is Blink’s default setting and what I would recommend using unless your Blink camera is always going to be in a dark setting.
Blink Night Vision Intensity
The Blink intensity setting is the option that controls how bright the IR emitter shines. This is useful for controlling glare in specific locations.
The Intensity setting also has three options: Low, Medium, High.
After you have the camera mounted and where you plan on keeping it, I’d recommend opening up a live stream when setting the IR intensity.
Steps to set your Blink Cameras IR Intensity
- Wait until nighttime
- Open up live view
- If being used for motion detection, stand as close as you think a person might reasonably stand.
- Adjust the IR intensity for the best image quality.
If the IR intensity is too high, the image will appear whitewashed. It will be hard to make out objects because everything seems white. Lower the Intensity.
If the IR intensity is too low, the image will appear dark. You won’t be able to see anything. Increase the Intensity.
What Is Dark Mode Setting On Blink Camera?
People will often see the dark mode setting and think it has something to do with night vision. In reality, it has nothing to do with night vision.
The dark mode option allows you to customize the look of your Blink app. Dark text on a white background appears in light mode, whereas light text appears on a dark backdrop in dark mode. The Blink app will match whichever mode your phone or tablet is presently set to in system mode.
So after recommended setting Why Blink Mini Camera Night Vision Not Working?
You’ve set the IR control mode to “On,” but the Blink camera is only showing a black image.
First and foremost, I’d want to point out that there have been known firmware problems in the past. If you own a Blink Mini, make sure the firmware is version 9.70 or above. This update was released in late 2020, so it should be far passed that point by now, but double-checking is always a good idea.
Troubleshooting Steps to Fix it?
- Replace The Batteries With New Batteries
- Ensure The IR Emitter Is Not Covered
- Reboot the Blink Camera
- Remove IR Reflective Materials
Replace The Batteries With New Batteries
If you have a battery-operated Blink camera, either the Indoor or Outdoor variants, difficulties with the IR emitter is one of the first symptoms that the batteries are going to expire.
Changing the IR intensity setting is one method I’ve seen folks play with this. A better image is obtained by lowering the intensity, but a darker image is obtained by increasing the intensity.
I’m not sure what’s going on here, but I’m guessing the batteries are running out of juice and can’t power both the camera and the high-intensity IR emitter.
Ensure The IR Emitter Is Not Covered
This is a common problem when users do not use the mount that came with their Blink camera, or they’re trying to hide the camera behind something.
If you are using custom housing, perhaps a housing so you can use your Blink Mini or Blink Indoor in an outdoor setting, make sure that the IR emitter is not covered.
Blink has diagrams on its website that indicate where the IR sensor is located.
Blink Mini Layout: Click Here
Reboot Blink Camera
I get that this is the beginning of your basic tech assistance, but there is a reason they encourage you to attempt it. It’s simple and can occasionally solve the problem.
Rebooting the device may resolve any firmware faults that have caused it to become stuck in a certain state. Although it’s a software flaw, you won’t have to wait for a firmware update.
For Blink, Mini unplug them from the power source and plug them back in.
If the problem starts back up again in a few days after it was seemingly resolved, it is probably a battery issue. Try replacing them. Blink recommends using lithium AA batteries.
IR Reflective Materials Must Be Removed
When in night vision mode, Blink cameras are extremely sensitive to IR light. That’s how they make a picture! They must be considerate.
However, if the IR light is reflected back into the lens, the camera will be blinded. In a dark room, imagine someone beaming a spotlight into your eyes. You’d be unable to see anything else as well.
Look at the camera view with night vision turned on and look for any white areas. White objects reflect the most infrared light back to the camera.
Shiny items are the most difficult to deal with. Consider the shine on certain types of paneling or the glossy coating on leaves. There are a variety of items that may reflect light back to you.
How To Reset Blink Mini Camera?
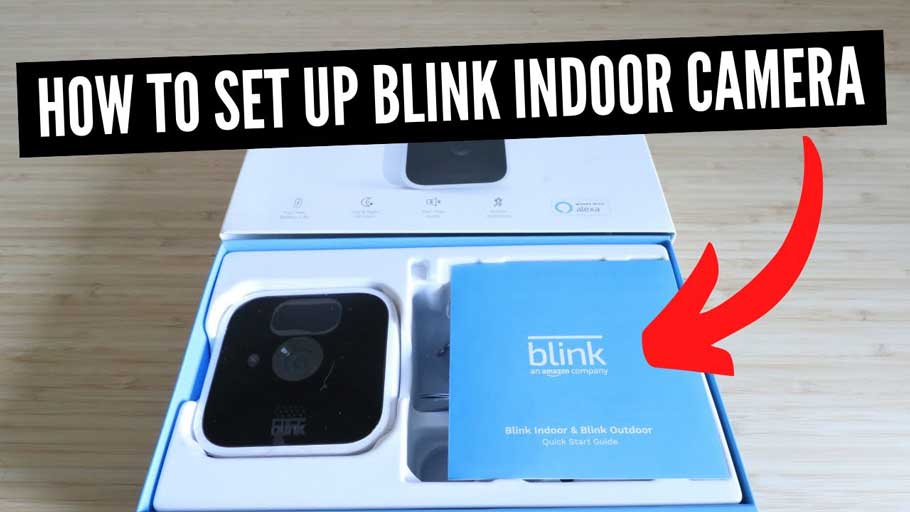
The Blink Mini has a reset button on the bottom side of the camera

Helpful Tip: Make certain to perform a reset before and while the Mini is plugged in for best results. We also recommend inserting either a paperclip or small screwdriver (not safety pins or thumbtacks) to reset the camera.
- A long press of the reset button (more than 5 seconds) will reset it.
- Both red and blue lights will flash rapidly shortly before the button is released.
- The blue light will then slowly blink, which indicates the camera is ready to be added to a system.
Contact Blink Support
If none of these solutions seem to be the issue, the camera might be malfunctioning and the IR emitter isn’t working. Blink will send you a replacement after going through basic troubleshooting processes as long as the camera is still under warranty.
The Blink Support “Contact Us” page is located here.






Add Comment