


How to Change Between HDCVI, Analog, and IP
Description
Follow these step-by-step instructions to change a HDCVI, analog, or IP channel on an HDCVI recorder (HCVR or XVR).
Prerequisites
- HCVR or XVR
- HDCVI, analog, or IP cameras (optional)
Video Instructions
Step-by-Step Instructions for HCVR
1. From the main menu, select Camera.

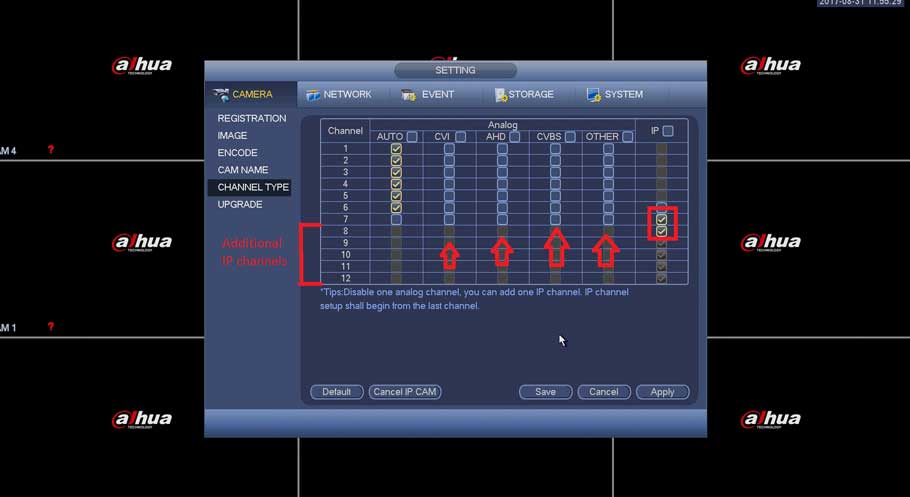
2. Select Channel Type.

3. Check off which channels are to be Coaxial, UTP and IP. Note: you can make one any of the channels IP ➞ Select Apply and Save.

Device will reboot once changes are saved.

Step-by-Step Instructions for XVR
1. From the main menu, select Camera.

2. Select Channel Type.

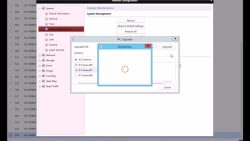
3. If you are trying to activate this XVR's additional IP channels then select “Add IP CAM”; this will require a reboot.

4. If you need to designate a coaxial channel for IP in addition to bonus channels then you can occupy those channels with IP in a reverse sequential order. If you need to force a coaxial channel for HDCVI, AHD, CVBS, or other, this would be the place, although this process should be automatic.

Instructions
 SystemUI Old
How to Change Between HDCVI, Analog, and IP
Description
Follow these step-by-step instructions to change a HDCVI, analog, or IP channel on an HDCVI recorder (HCVR or XVR).
Prerequisites
- HCVR or XVR
- HDCVI, analog, or IP cameras (optional)
Video Instructions
Step-by-Step Instructions for HCVR
1. From the main menu, select Camera.
2. Select Channel Type.
3. Check off which channels are to be Coaxial, UTP and IP. Note: you can make one any of the channels IP ➞ Select Apply and Save.
Device will reboot once changes are saved.
Step-by-Step Instructions for XVR
1. From the main menu, select Camera.
2. Select Channel Type.
3. If you are trying to activate this XVR's additional IP channels then select “Add IP CAM”; this will require a reboot.
4. If you need to designate a coaxial channel for IP in addition to bonus channels then you can occupy those channels with IP in a reverse sequential order. If you need to force a coaxial channel for HDCVI, AHD, CVBS, or other, this would be the place, although this process should be automatic.
 WebUI New
Step-by-Step Instructions for XVR
1. Enter the IP of the device into a browser (default 192.168.1.108)
At the Web Login
Enter the Username and Password
Click Login
2. Click Management

3. Click Camera

4. Click Channel Type

5. Check the box under the IP column next to the Channel to enable IP for

6. Click Save

Confirm the prompts that appear by clicking OK


The system will reboot
When the unit is back up the IP channels will be enabled


I am having trouble with the installation
I really love you
my recorder is not working