how to reset the camera?
1. Please power the camera on
2. After you power the cameras for 15 seconds, find the reset button, hold on the reset button for 15-20 seconds to reset this camera.


How to share the device with other people
1. Please connect the camera to the app:
There are two methods for you, pls see below. If you have done this step, pls go to step 2 directly.
A. How to use phone to connect camera without ethernet cable
B. How to set up camera with cable only for camera with ethernet port
Please click the “Edit” button and then the ” Share” button on the main interface.
2. Please click ” Invite with QR code“.

3. You can ask the recipient to directly scan the QR code on your phone’s screen to add the device, or you can share the QR code in other ways.

The following are the steps for the recipient to add the device:
Step 1: Click the “+” button on the main interface;
Step 2: Click “Connect a friend’s camera”;
Step 3: Scan the QR code to add.
4.After the device has been added to the recipient’s phone, the recipient can watch the live view, record the live video and take a screenshot. However, the recipient cannot control the device or adjust its settings.
5. If you want to cancel your sharing, please click the “sharing” button on the main interface, then click “Cancel the share”.,
What to Do if My Phone Can’t Connect Camera?
1. Download and install the APP
Please go to “Google Play” or “App Store” on your mobile phone, search for “JoyLite”, then download and install it on your phone.
2. Confirm your Wi-Fi status
2.1. Please check if your wireless router has enabled DHCP and if it is a 2.4 GHz network. (The device does not support 5GHz Wi-Fi currently.)
2.2. Please ensure your smartphone has been connected to the wireless router.
2.3. Please ensure there is no special character in the Wi-Fi name and password, and their length does not exceed 30 digits.
3. Check the device’s connection status
Please use the standard power cable to connect the device’s DC interface, then the device will start up and send out a prompt tone. You can also use an object to block or cover the device’s photoresistor to check if the device’s infrared lights will be turned on.
4. Connect the device
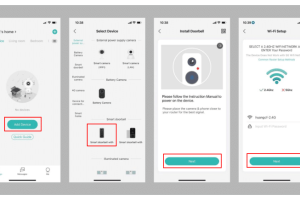
4.1. Open the APP and click the “+” button.
4.2. Click “Add a new camera”.
4.3. Click “PTZ Camera”.
4.4. Input your Wi-Fi password and click “Confirm“.
4.5. You can configure the device by sound wave or by QR Code. Here we present the setting steps to configure by QR Code:
Please hold the QR code on the phone to face the camera lens within 10 to 20 cm, then the device will automatically scan the code and send out the first prompt tone. Wait a moment and you will hear the second joyful prompt tone, which means your configuration is completed, then please click “Next”.
Note: Please ensure the distance between the device and the router is within 3 meters and there is no obstacle between them.
If your adding fails, please press the device reset button to reset the device and return to step C to reconfigure.
F. Scan the device’s QR Code, or input the code by yourself to add the device.
G.?Finally, the device will be added to your phone, and you can start the live preview.
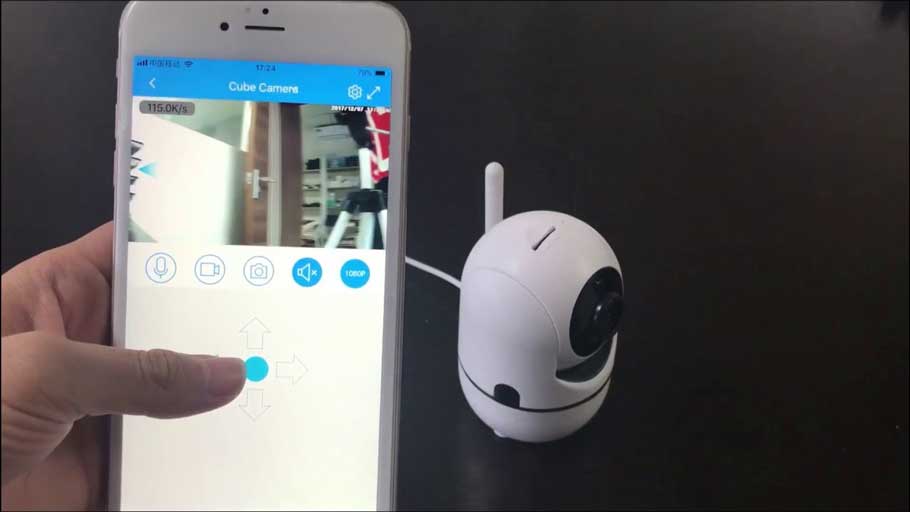
How to connect camera to the phone without ethernet cable?
First of all, please ensure your mobile phone has been connected to the network. (take iPhone as an example here)
1. Open the “Joylite” APP and click the “+” button.

2. Scan the QR code on the camera.

Note: If the QR code can’t be recognized, please input the UID manually.
3. Click “PTZ Camera”.

4. Please put a pin into the reset hole of the camera and push and hold it until you hear a beep sound:


5. Input your Wi-Fi password and click “Confirm“.

Note: If the mobile phone didn’t connect to the 2.4GHz wifi, the APP will pop out a tips, and please click confirm to switch the network.

6. Click the button to release wave sound and put the mobile phone near to the camera:


Note: When the mobile phone is sending the sound wave, please turn up the speaker of the mobile phone.
7. Finally, the device will be added to your phone, and you can start the live preview


If the camera is failed to bind to the APP, please reset the camera to the factory default settings and try again.
How to Set Up Camera with Cable (only for Camera with Ethernet Port)
Note: This tutorial is only applicable to those devices with an Ethernet port.
Please power on the device and the device will be started.
Please connect to the wireless router. Connect one end of the network cable to the wireless router and the other end to the network port of the device, then the portlight will be turned on.
Add the device:
1. Open the “JoyLite” APP and click the “+”?button.
2. Click “Add a new camera”.
3. Select the camera model and configure the camera as required.
4. Directly click “Skip” in the upper right corner.
5. Scan the device QR code, or manually enter the device ID number to add.
Note: If your adding fails, please press the device reset button to reset the device and return to step C to reconfigure.
6.Finally, the device will be added to your phone, and you can start the live preview.
7. Click the System Settings button.
8. Click “Network Switching”.
9. Please select the SSID of the wireless router you want to connect to, enter the current Wi-Fi password and click ” Switch the network”. Then the device will reboot and automatically connect to the Wi-Fi network.
Note: After you finish all the configuration steps, you can unplug the device’s Ethernet cable, then the device can work normally via the wireless network.
How to Set Up Motion Detection and Recording?
1. First of all, please power off the device before installation. The device supports up to 64G Micro SD card. Before inserting the card, please ensure the SD card can work normally and the data is cleared. Please pay attention to the SD card’s direction when inserting.
2. After the device is successfully connected, please click the system settings button.

3. Please choose “Store information”.

4. Please check if the device can recognize the SD card information. Please format the SD card if this is the first time you use the device. After the SD card is successfully formatted, the SD card status will show “Is recording”.


5. Please click “Guard Scene”. Please note that the motion detection alarm function is enabled by default. You can click the “Set time range” to set the time period.


6. Once the motion detection is triggered, APP alarm push notifications will pop up.
7. You can click the “…” button in the upper right corner to view the alarm information.

Note: If there is no micro SD card in the device and the motion detection alarm function is enabled by default, you can only receive APP alarm pushes, but without snapshots and video recordings.
8. Finally, please return to the main interface and click the video playback menu to view the SD card recordings. (The blue bar represents real-time video recordings and the red bar represents motion detection recordings)


What to do if the camera can’t recognize the SD card
A. First of all, please ensure your Micro SD card is a branded product from the regular channel. The device supports up to 64G Micro SD card;
B. Please connect the Micro SD card to a computer or other digital devices to check if it can be recognized normally. If it can be recognized, please format it. If not, it is a defective Micro SD card. Please use another card to try again.
C. Please power off the device, insert the Micro SD card in a correct way, then enter the APP interface to check if it can be recognized normally; if not, please contact our customer service at
How to reset the camera?
1. Please power on the camera and connect this camera to the router by the ethernet cable.
Then the indicator light on the RJ45 port will light up.
2. After you power on the cameras for 15 seconds, open the waterproof cover at the back of the camera, to find the reset button, hold on the reset button for 15-20 seconds to reset the camera.
How to Connect the Camera with Cable to the Phone App?
Note: This FAQ is only applicable to those devices with an Ethernet port.
Download and install the APP “Joylite”.
Go to “Google Play” or “App Store” on your mobile phone, search for “Joylite”, and then download and install it on your phone.
1. Reset camera
1). Please power the camera on, and connect this camera to the router by the ethernet cable. And the network port indicator light on the RJ45 port will light up.

2). After you power the cameras for 15 seconds, open the waterproof cover at the button of the camera, find the reset button, hold on to the reset button for 15-20 seconds to reset this camera.

2. Add the device
1). Open the “JoyLite” APP and click the “+” button.

2). Click “Add a new camera”.

3). Select the camera model and configure the camera as required. For the I41DH, you need to choose the “Mini bolt” type.

4). It will ask you to reset it again, you can reset the camera refer to Step 1. Please ignore the image on the phone for this step.

5). For this model I41DH, it has no audio and indicator light. Please ignore this step image on the phone.

6). Then please click the “Skip” button at the right top. Please don’t input the wifi information at this step.

7). You can scan the QR code or input the SN manually


8). Then you can see it “bind success” and you can see the live view.


9). Click the “setting” button on the live view and find the “network”.


10). Choose your wifi information, input the wifi password, then click ”
Switch the network”.


11). After you see the message: “Network switch is successful”, then you can unplug the camera from the router to check can you still see the image.

What to Do if Phone Can’t Connect Camera?
1. Please confirm you use the app “Joylite”
Download and install the APP
Go to “Google Play” or “App Store” on your mobile phone, search for “Joylite”, and then download and install it on your phone.

2. Confirm your wifi status.
1). Please confirm you have enabled “DHCP” in your router. The wifi is 2.4G Hz Wifi.
2). Please confirm your phone has been connected to this wifi.
3). Please be sure there is no special character in the Wi-Fi name and password, and their length does not exceed 30 digits.


3. Please check your camera’s connection status.
1). Power on the camera, connect the camera to the router by an ethernet cable, the connector RJ45 port’s indicator light will lit up.
2). Check the camera’s infra light lit up or not (Use your hands to cover the photo resistance, the infra light should be lit up on normal status).


4. If still fail to connect the camera to the phone app, please reset your camera and reconnect it to your phone app again refer to the link below:
https://support.sannce.com/hc/en-us/articles/900000448206





I really love you
I am having trouble with the installation
problem not solved thanks
I am having trouble with the installation
It was a great sharing
problem not solved thanks
problem not solved thanks
please provide support for me i leave my email address
Can you write your contact number?
I really love you