Preparation
Analog Speed Dome, DVR, Coaxial Cable, RS-485 Cable
How to Control Analog Speed Dome by Pelco-D/P Protocol
1. Connect DVR and Analog PTZ Camera
-
-
1.1 Power on analog PTZ camera
-
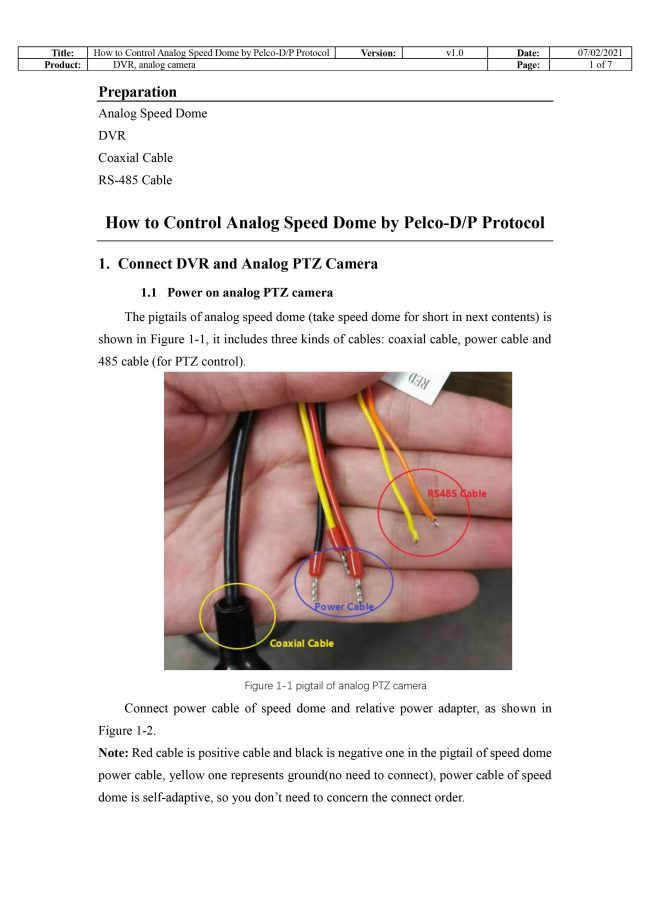
The pigtails of analog speed dome (take speed dome for short in next contents) is
shown in Figure 1-1, it includes three kinds of cables: coaxial cable, power cable and 485 cable (for PTZ control).

Figure 1-1 pigtail of analog PTZ camera
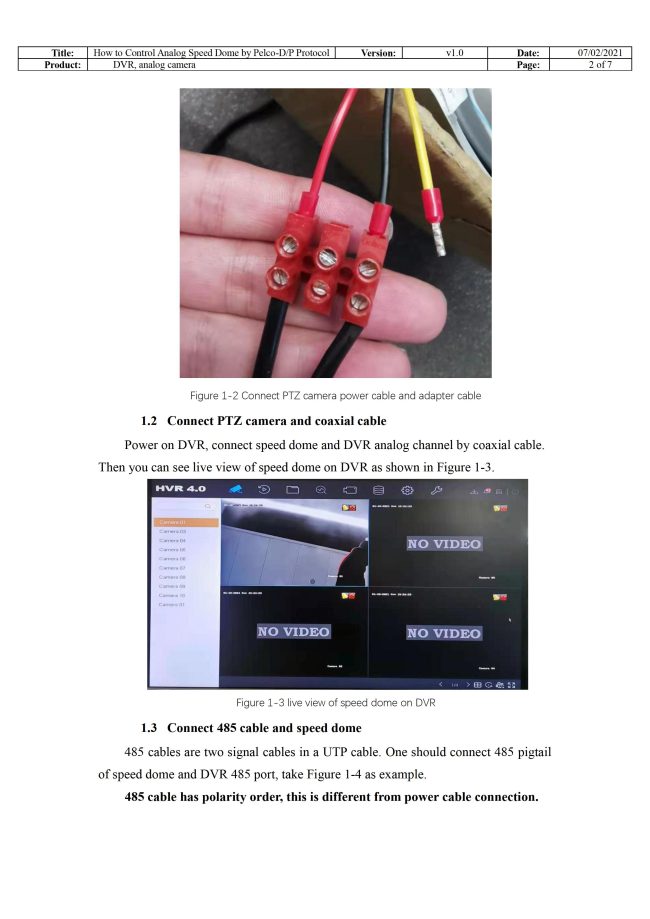
Connect power cable of speed dome and relative power adapter, as shown in Figure 1-2.
Note: Red cable is positive cable and black is negative one in the pigtail of speed dome power cable, yellow one represents ground(no need to connect), power cable of speed dome is self-adaptive, so you don’t need to concern the connect order.

Figure 1-2 Connect PTZ camera power cable and adapter cable
-
1.2 Connect PTZ camera and coaxial cable
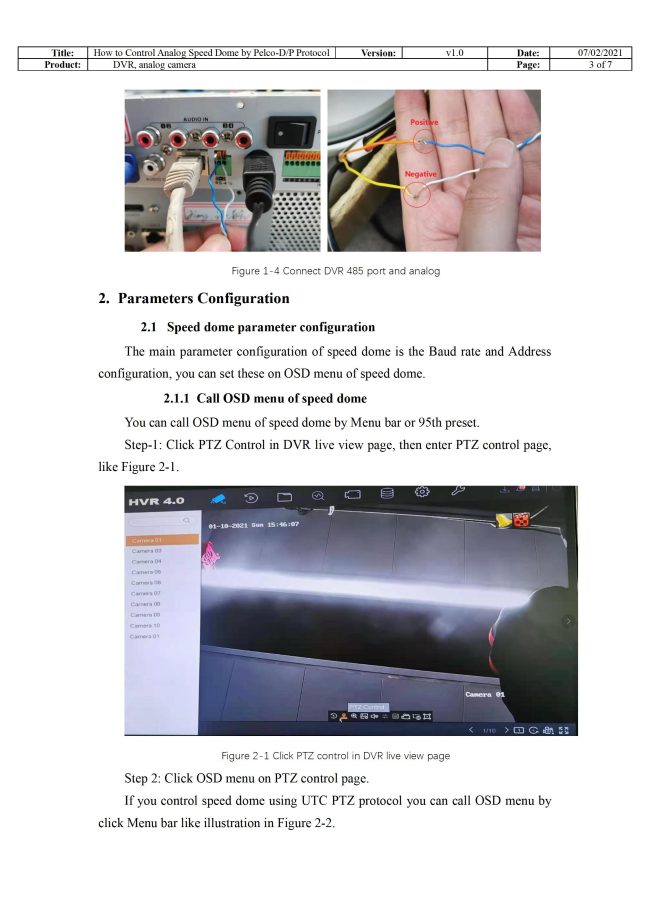
Power on DVR, connect speed dome and DVR analog channel by coaxial cable.
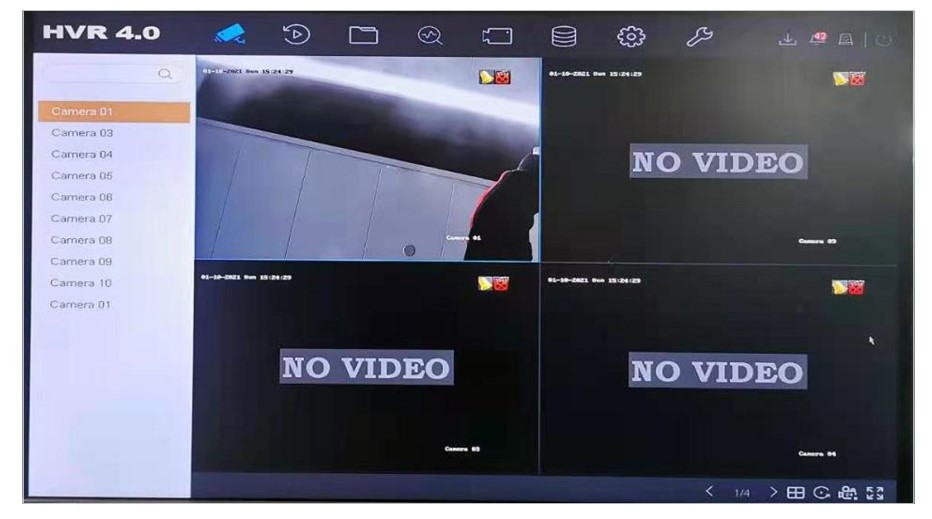
Then you can see live view of speed dome on DVR as shown in Figure 1-3.

Figure 1-3 live view of speed dome on DVR
-
1.3 Connect 485 cable and speed dome
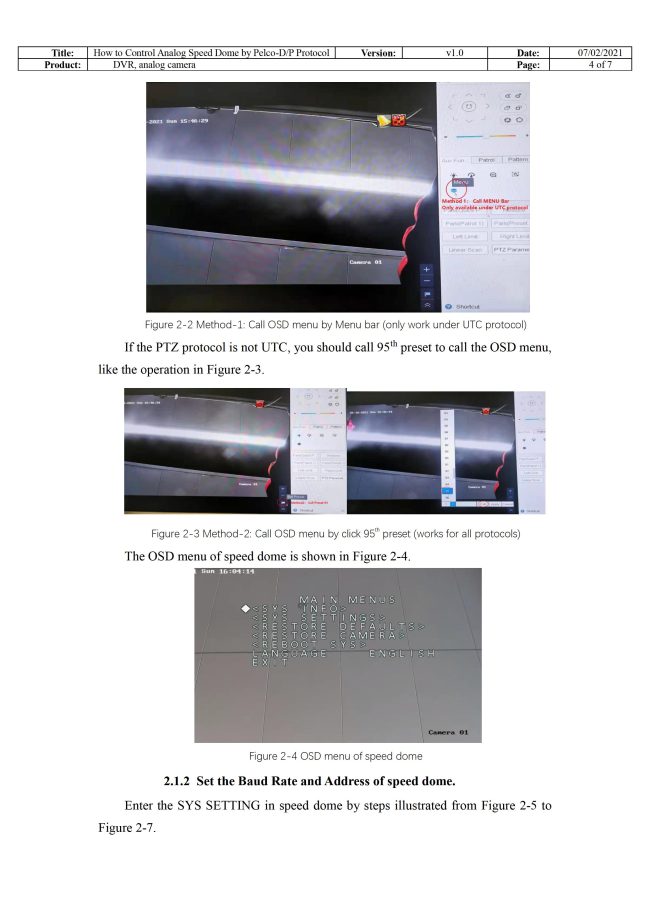
485 cables are two signal cables in a UTP cable. One should connect 485 pigtail of speed dome and DVR 485 port, take Figure 1-4 as example.
485 cable has polarity order, this is different from power cable connection.

Figure 1-4 Connect DVR 485 port and analog
-
2. Parameters Configuration
-
2.1 Speed dome parameter configuration
-
The main parameter configuration of speed dome is the Baud rate and Address configuration, you can set these on OSD menu of speed dome.
-
2.1.1 Call OSD menu of speed dome
You can call OSD menu of speed dome by Menu bar or 95th preset.
Step-1: Click PTZ Control in DVR live view page, then enter PTZ control page, like Figure 2-1.

Figure 2-1 Click PTZ control in DVR live view page
Step 2: Click OSD menu on PTZ control page.
If you control speed dome using UTC PTZ protocol you can call OSD menu by click Menu bar like illustration in Figure 2-2.

Figure 2-2 Method-1: Call OSD menu by Menu bar (only work under UTC protocol)
If the PTZ protocol is not UTC, you should call 95th preset to call the OSD menu,
like the operation in Figure 2-3.

Figure 2-3 Method-2: Call OSD menu by click 95th preset (works for all protocols)
The OSD menu of speed dome is shown in Figure 2-4.

Figure 2-4 OSD menu of speed dome
-
2.1.2 Set the Baud Rate and Address of speed dome.
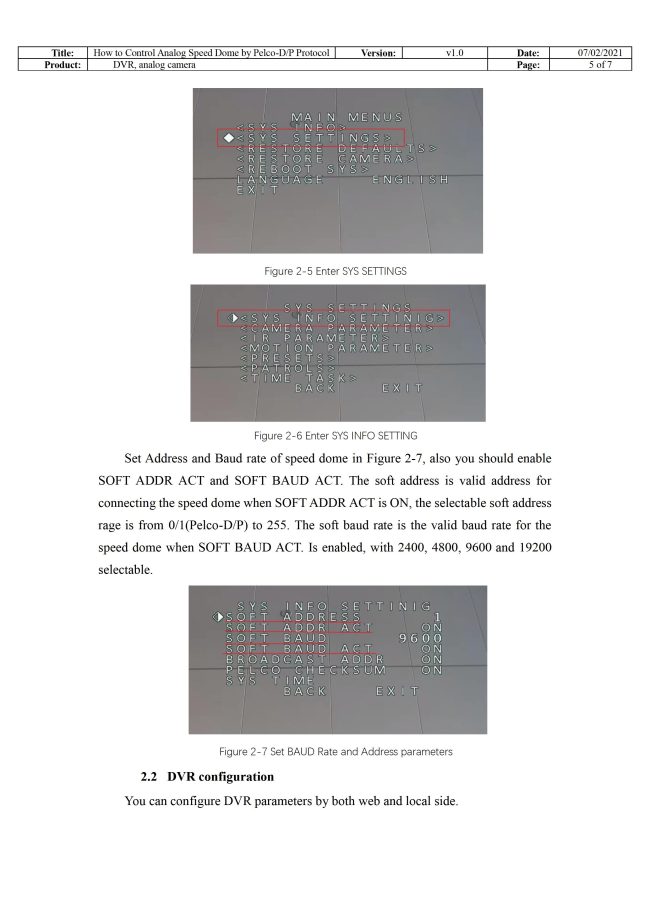
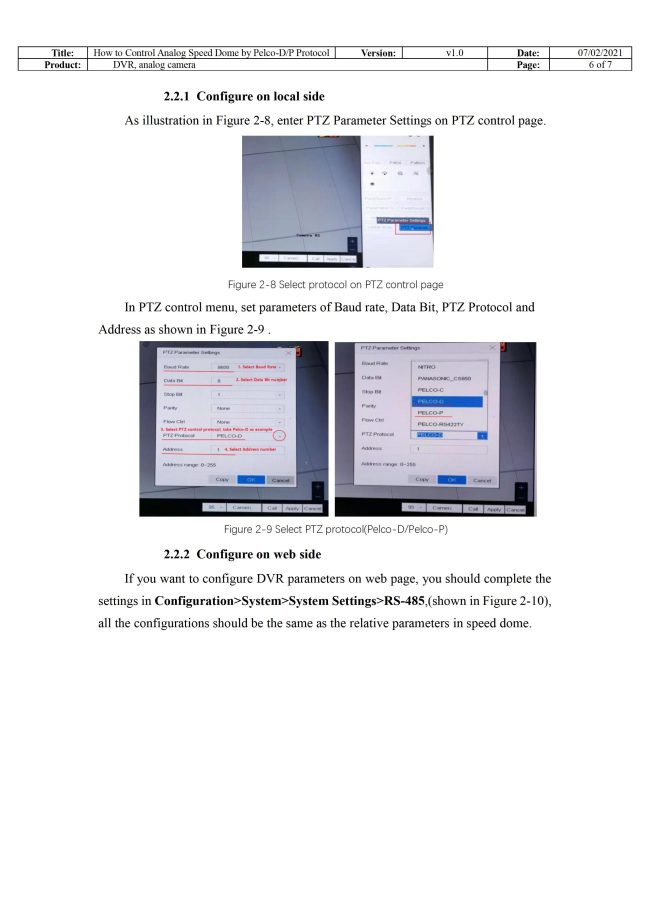
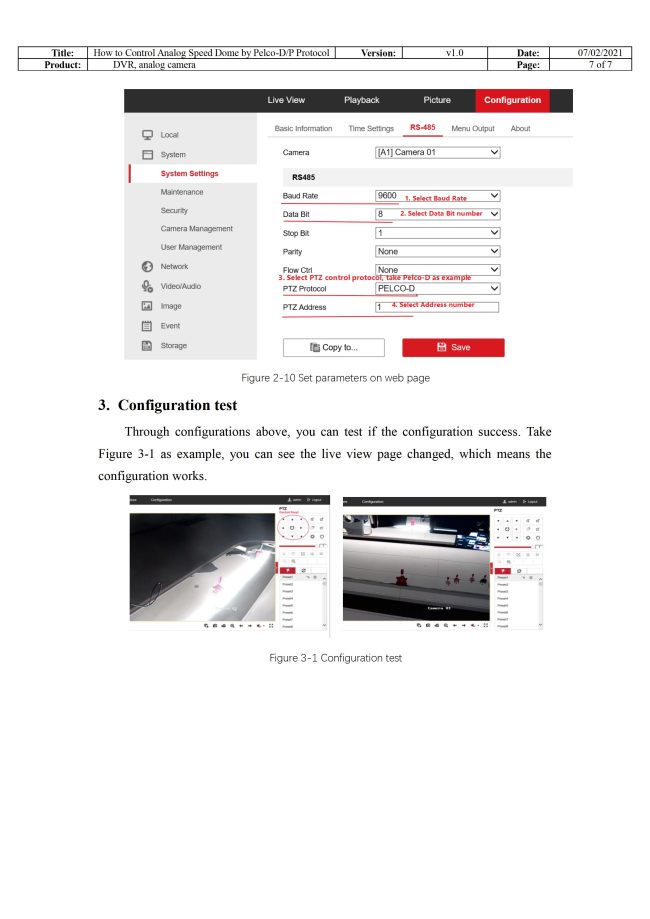
Enter the SYS SETTING in speed dome by steps illustrated from Figure 2-5 to Figure 2-7.
 Figure 2-5 Enter SYS SETTINGS
 Figure 2-6 Enter SYS INFO SETTING
Set Address and Baud rate of speed dome in Figure 2-7, also you should enable SOFT ADDR ACT and SOFT BAUD ACT. The soft address is valid address for connecting the speed dome when SOFT ADDR ACT is ON, the selectable soft address rage is from 0/1(Pelco-D/P) to 255. The soft baud rate is the valid baud rate for the speed dome when SOFT BAUD ACT. Is enabled, with 2400, 4800, 9600 and 19200 selectable.

Figure 2-7 Set BAUD Rate and Address parameters
You can configure DVR parameters by both web and local side.
2.2.1 Configure on local side
As illustration in Figure 2-8, enter PTZ Parameter Settings on PTZ control page.

Figure 2-8 Select protocol on PTZ control page
In PTZ control menu, set parameters of Baud rate, Data Bit, PTZ Protocol and
Address as shown in Figure 2-9 .

Figure 2-9 Select PTZ protocol(Pelco-D/Pelco-P)
-
2.2.2 Configure on web side
If you want to configure DVR parameters on web page, you should complete the settings in Configuration>System>System Settings>RS-485,(shown in Figure 2-10), all the configurations should be the same as the relative parameters in speed dome.
 Figure 2-10 Set parameters on web page
-
3. Configuration test
Through configurations above, you can test if the configuration success. Take Figure 3-1 as example, you can see the live view page changed, which means the configuration works.
 Figure 3-1 Configuration test



problem not solved thanks
I can’t upload